Food Photography Tips: 20 Secrets for Stunning Photos (2026)
The difference between a food photo that gets scrolled past and one that stops someone mid-scroll? It's rarely the camera. It's technique.
These 20 food photography tips cover everything from lighting and camera angles to styling tricks and editing shortcuts — organized into three clear phases so you can start using them during your next shoot. If you've been wondering how to take food photos that actually look professional, you're in the right place.
Here's why this matters: restaurants with quality food photos see up to 70% more delivery orders on platforms like GrubHub. And 74% of people now use social media to decide where to eat. Your food photos aren't just nice-to-have — they're really doing the selling for you.
Whether you're shooting with a $3,000 DSLR or last year's iPhone, these food photography tips work.
Quick Summary: Great food photography comes down to three things — light it from the side (never from the front), style it with intention (odd numbers, contrasting plates, fresh garnishes), and edit with restraint (white balance first, vibrance over saturation). Master these 20 tips and your food photos will look professionally shot, even from a smartphone.
Part 1: Shooting Food Photography Tips — Light, Angles, and Composition
Get these fundamentals right and everything else becomes dramatically easier. Shooting is where 80% of your photo quality is decided — styling and editing can't rescue a badly lit, poorly composed shot.
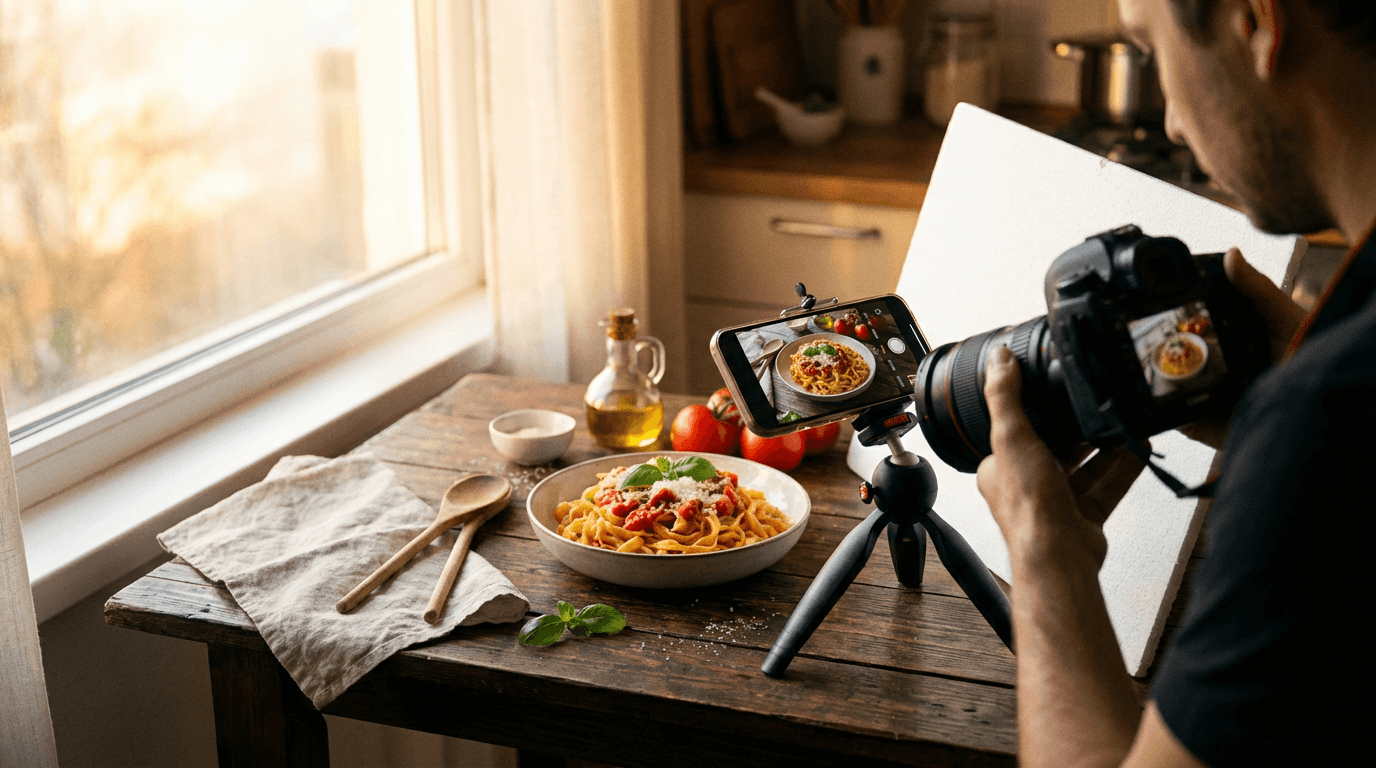
Tip 1: Chase the Window, Not the Overhead Light
Natural window light is the single biggest upgrade you can make to your food photography. Full stop.
Position your dish 2–4 feet from a large window. You want indirect daylight — not a beam of sun hitting the plate directly. If the sun is harsh, try diffusing it with a white curtain, bedsheet, or even parchment paper taped over the glass.
The critical move: turn off every other light in the room. Overhead kitchen lights cast a yellow or green tint that makes food look sickly. Your phone's auto white balance can't fully correct it when multiple light sources compete. One clean light source — that's the goal.
If you're shooting in a restaurant with no windows, try using a portable LED panel (around $30–50) with daylight color temperature (5000–5500K). It really is the next best thing to natural window light.
Tip 2: Light From the Side or Back — Never the Front
Where you place the light relative to your dish changes everything about texture, depth, and mood.
Side light (light coming from 9 o'clock or 3 o'clock) creates shadows that reveal texture — grill marks, the crust on bread, the bubbling cheese on a pizza. It's the most versatile lighting direction for food.
Backlight (light coming from behind the dish, toward you) creates a beautiful rim glow. It's really stunning for beverages, soups, and anything translucent. The dish literally glows.
Front light (light coming from behind the camera) flattens everything. No shadows, no texture, no depth. It's the reason most flash photos of food look terrible.
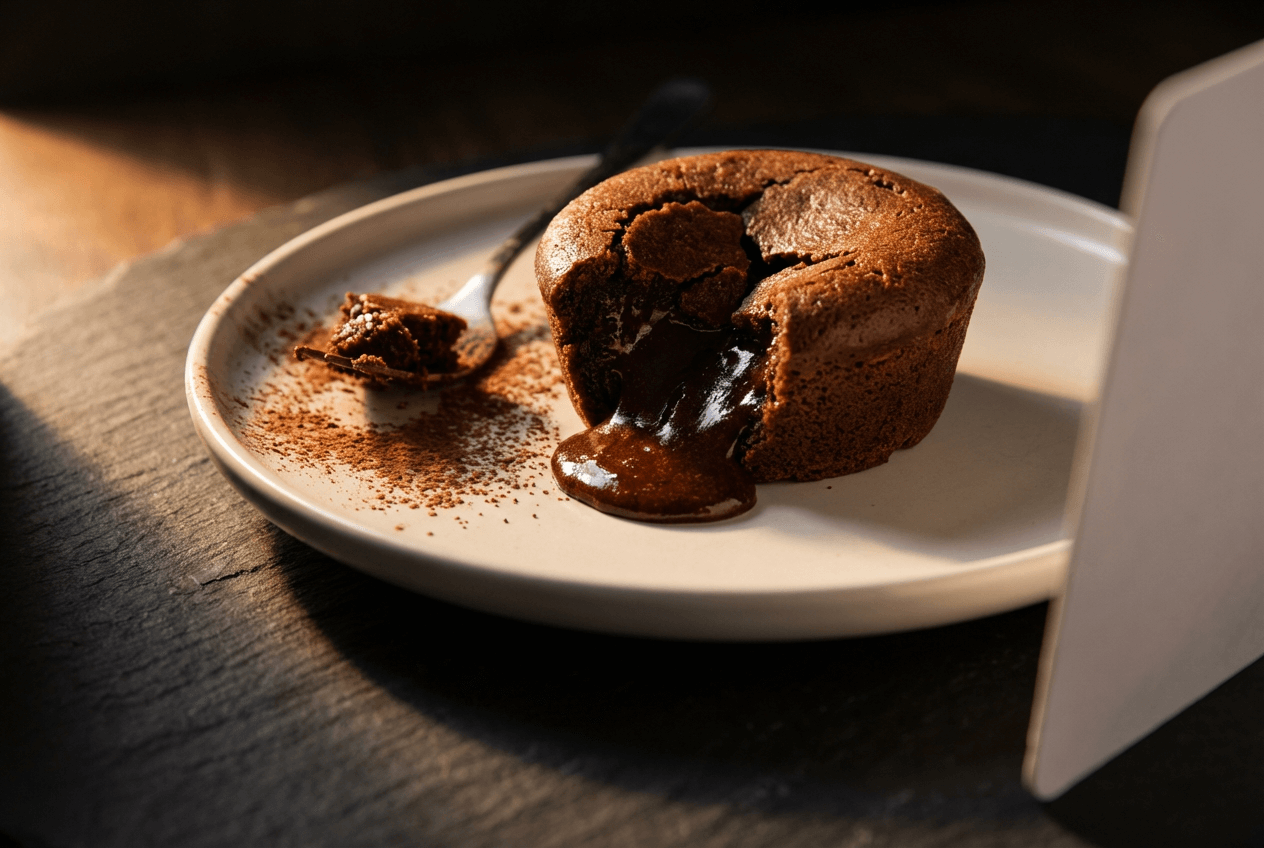 Side-lit chocolate lava cake showing how directional light reveals food texture and creates appetizing depth
Quick fix: place a white card, piece of foam board, or even a sheet of aluminum foil opposite your light source. This bounces light back into the shadows so they're not too dark. Professional food photographers call this a "bounce card" — it costs nothing and changes everything.
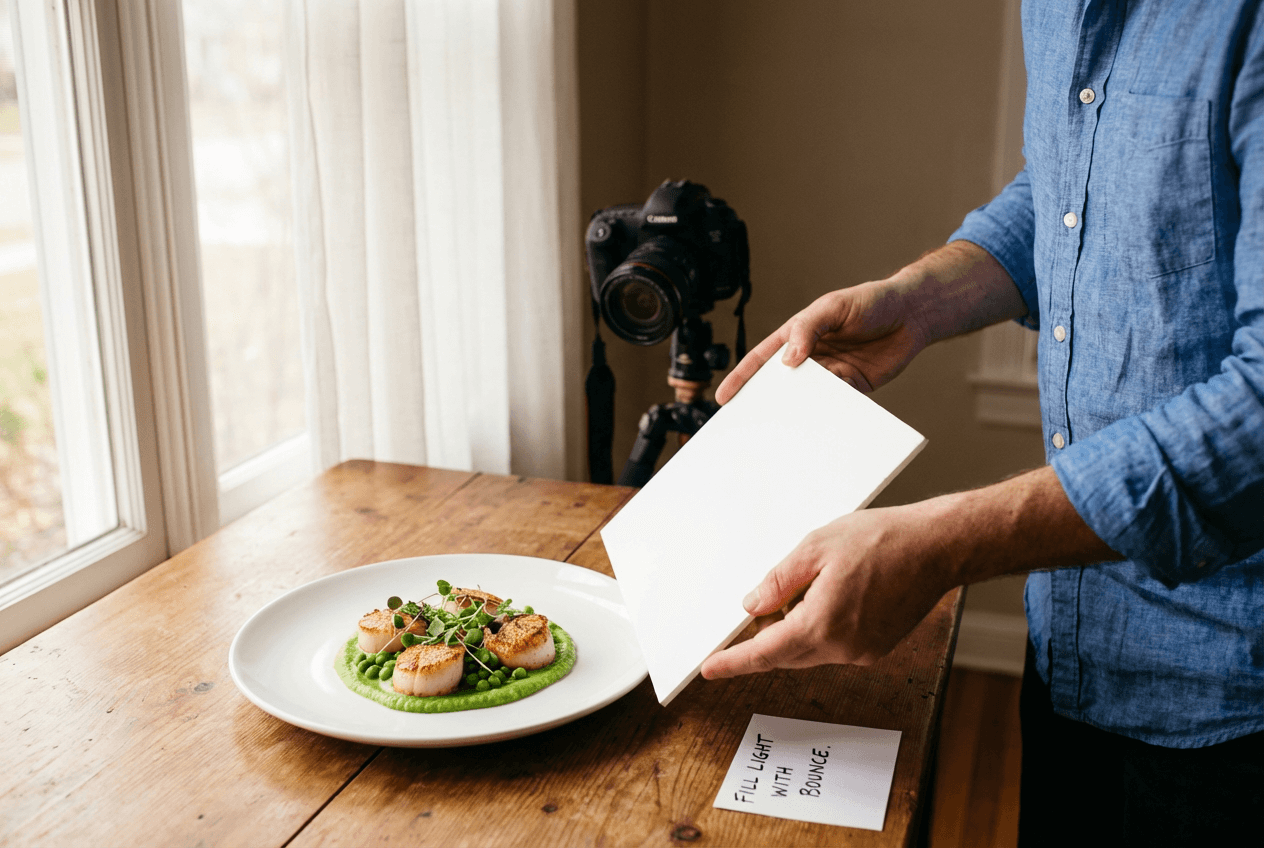 Food photographer using white bounce card to fill shadows on plated scallops during natural light food shoot
Tip 3: Master the Three Camera Angles
Not every dish looks good from every angle. Knowing how to take food photos from the right angle is one of those food photography tips that really separates amateurs from pros — whether you're using an iPhone or a DSLR.
Flat lay (90°, straight down): Best for flat dishes with interesting patterns on top. Pizza, charcuterie boards, grain bowls, cookie spreads, and table scenes. You see everything laid out beautifully.
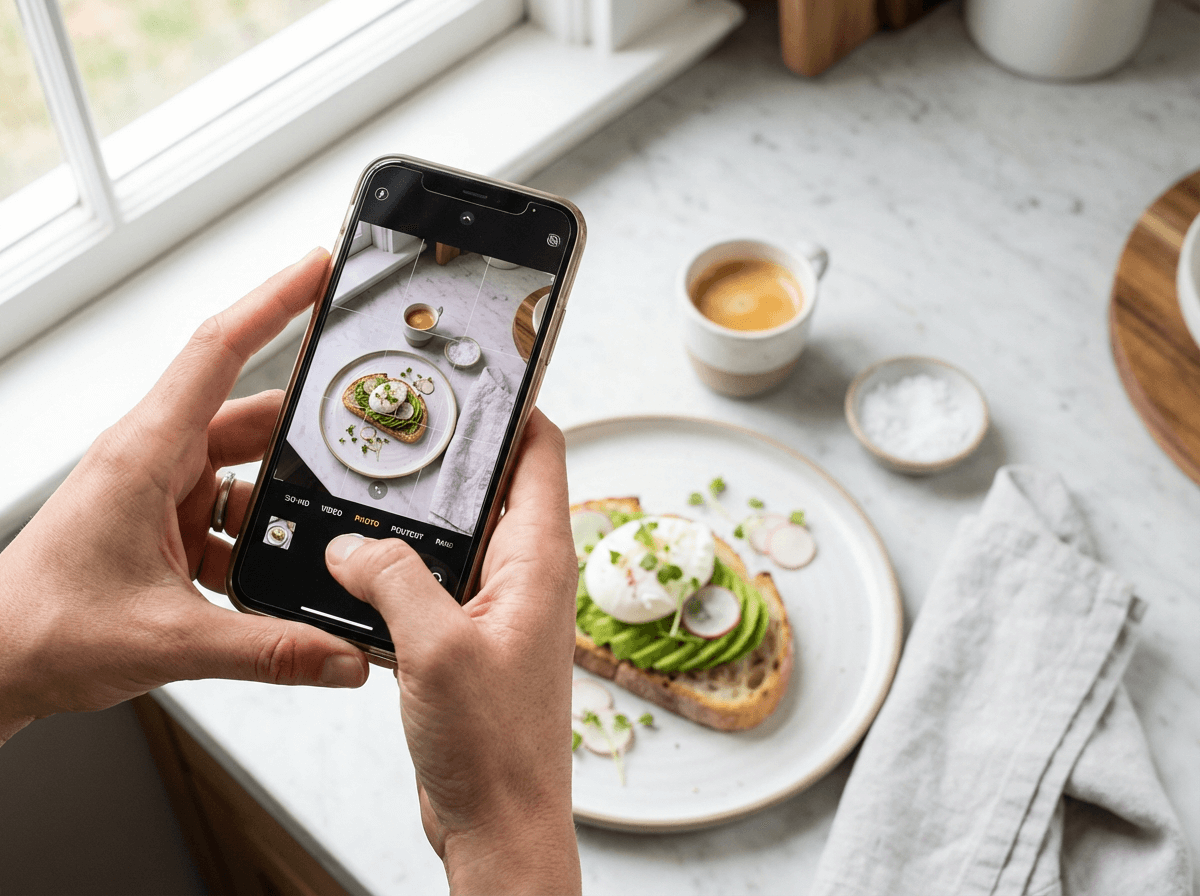 Hands photographing styled avocado toast brunch scene from above with smartphone showing camera grid overlay
45-degree angle: The most versatile angle and where most food photos should start. It shows both the top and side of a dish — perfect for pasta, plated entrées, burgers, and most restaurant meals. It mimics how you'd naturally see food sitting across the table.
Eye level (0°): Best for tall foods that need height showcased. Layer cakes, stacked pancakes, towering burgers, cocktails, and milkshakes. Try shooting eye-level on a bowl of soup and it'll look like a wall of ceramic with food hiding behind it.
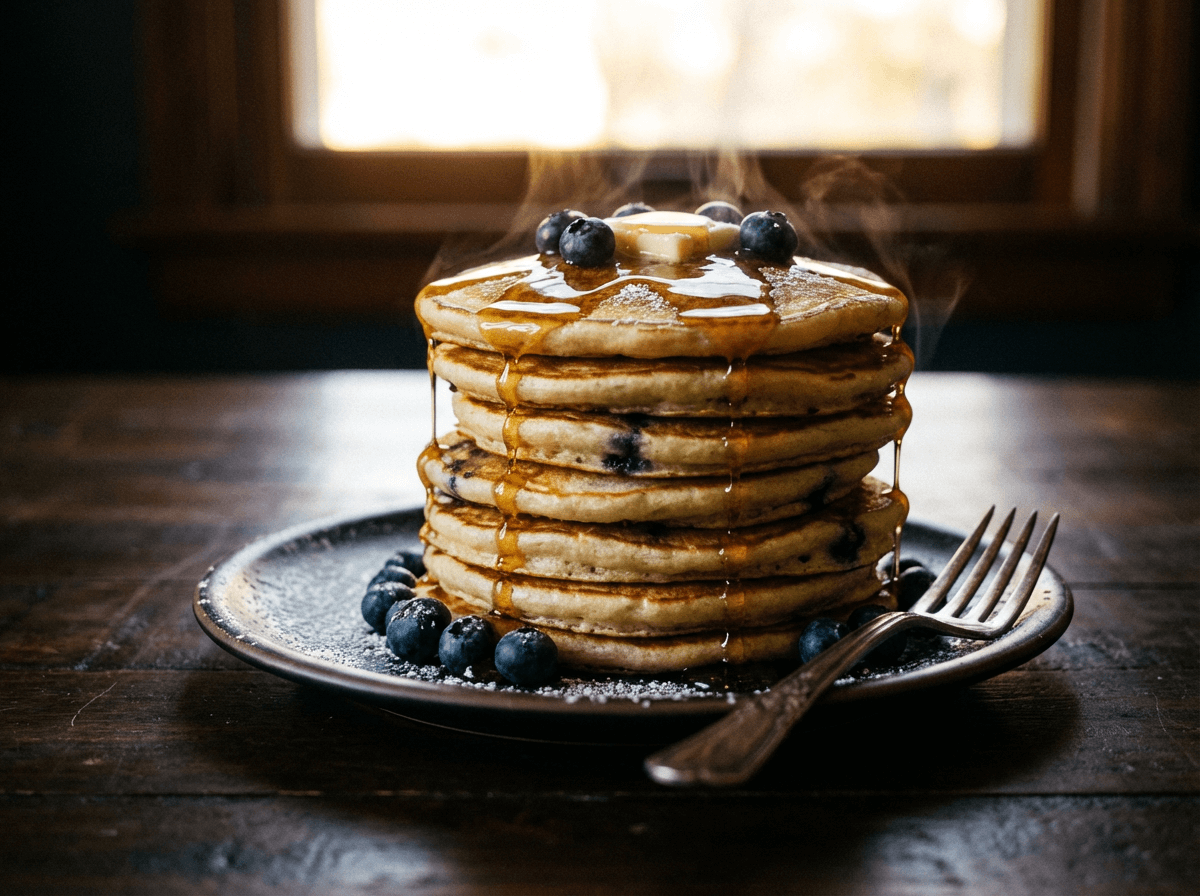 Eye-level food photography of tall stacked blueberry pancakes showing how low camera angle emphasizes height
The rule: Flat dishes go flat lay. Tall dishes go eye level. Everything else starts at 45 degrees.
Tip 4: Apply the Rule of Thirds (Stop Centering Everything)
Open your phone camera settings and enable the grid overlay. You'll see a 3×3 grid on your screen. Place your hero dish at one of the four points where the lines intersect — not dead center.
Off-center composition creates visual tension. The viewer's eye has to move across the frame, which makes the image more dynamic and interesting. Dead center feels static, like a passport photo for pasta.
When centering does work: Perfectly symmetrical flat lays, a single bowl shot straight overhead, or when the dish itself is the only element in the frame. Centering paired with negative space can feel intentional and modern. But for multi-element shots, the rule of thirds composition really wins every time.
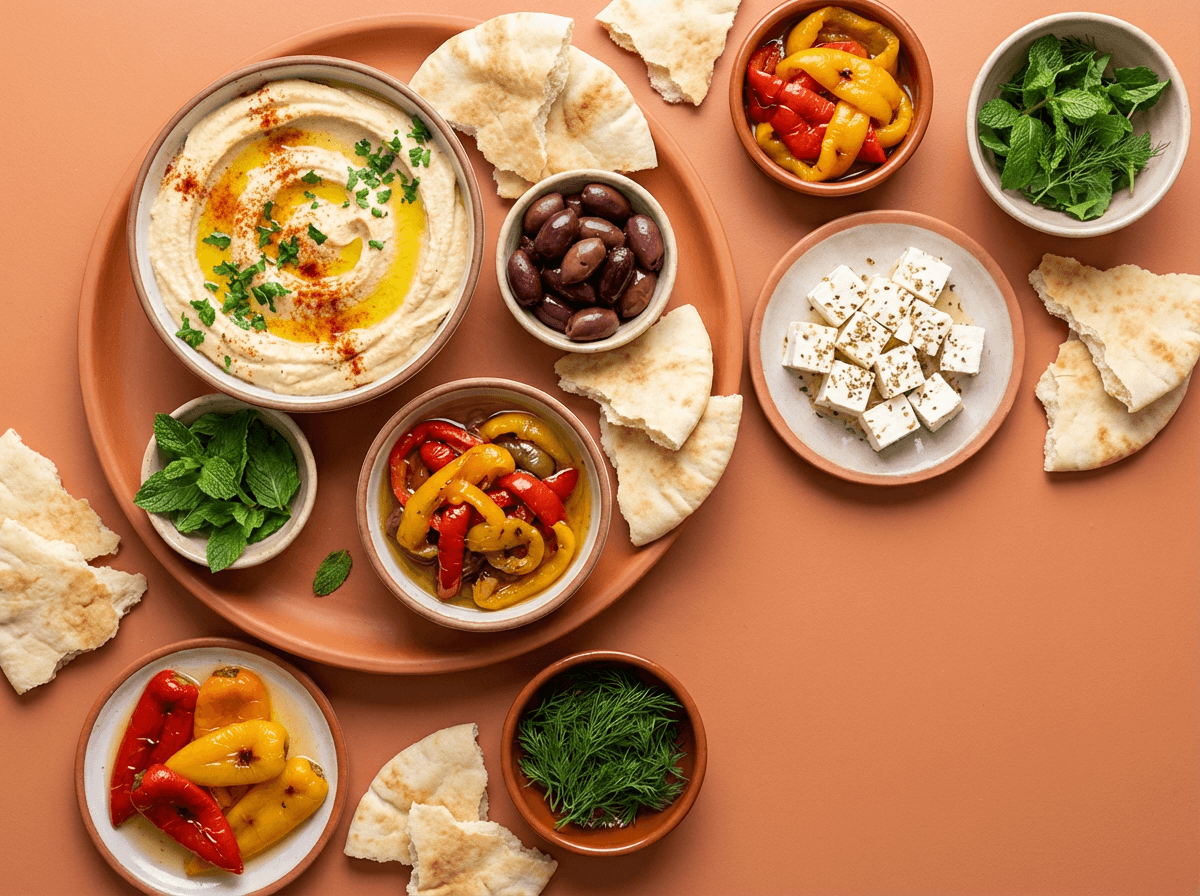 Overhead flat-lay food photography demonstrating rule of thirds composition with Mediterranean mezze spread
Tip 5: Embrace Negative Space
Don't fill every inch of the frame. Let your food breathe.
Clean, empty area around and above the dish draws the viewer's eye straight to what matters — the food. It also gives your photos a modern, editorial quality that feels premium rather than cluttered.
Negative space serves a practical purpose too: it leaves room for text overlays on social media posts, delivery platform listings, and marketing posters. If you plan on using your photos for Instagram stories or menu banners, try shooting wider than you think you need and crop later.
A simple white surface or clean wooden table with your dish off to one side? That's a composition that works across every platform.
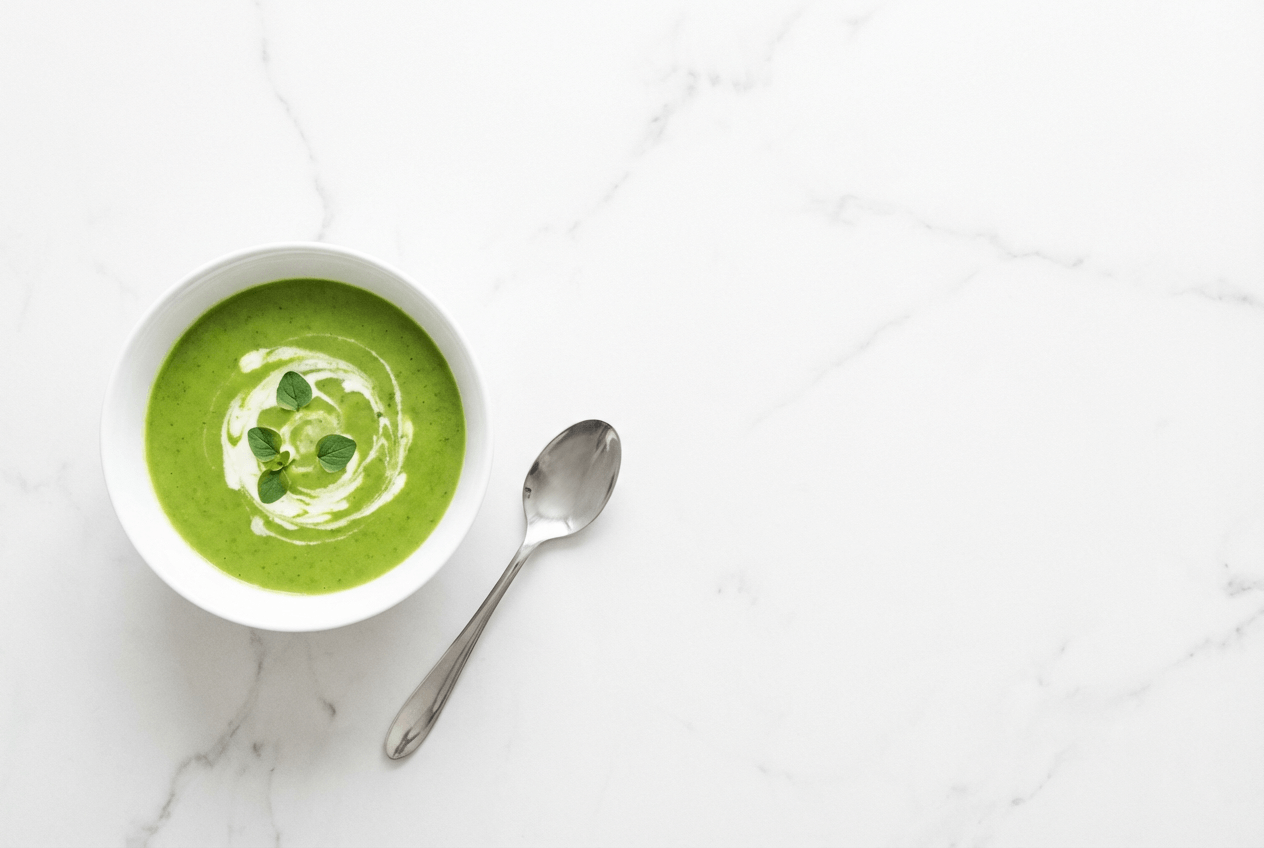 Minimalist food photography composition with negative space showing single bowl of pea soup on clean white marble
Tip 6: Use Color Theory to Make Dishes Pop
This is one of the most overlooked food photography tips, and it's the one that creates the biggest visual impact once you understand it. Color theory isn't just for designers — it's a secret weapon for anyone shooting food.
Complementary colors sit opposite each other on the color wheel. Using complementary pairings creates maximum contrast and makes each color vibrate:
- Red + green (tomatoes on a bed of fresh basil)
- Orange + blue (salmon on a slate blue plate)
- Yellow + purple (lemon tart with lavender garnish)
Analogous colors sit next to each other on the wheel. They create warm harmony:
- Reds, oranges, and yellows together (autumn-themed dishes)
- Greens, teals, and blues (fresh salads on cool-toned surfaces)
The practical shortcut: White plates work with everything — they're the safest choice. But if you want something that really explodes visually, try putting brightly colored dishes on dark surfaces (black slate, dark wood, charcoal ceramic). The contrast does the heavy lifting for you.
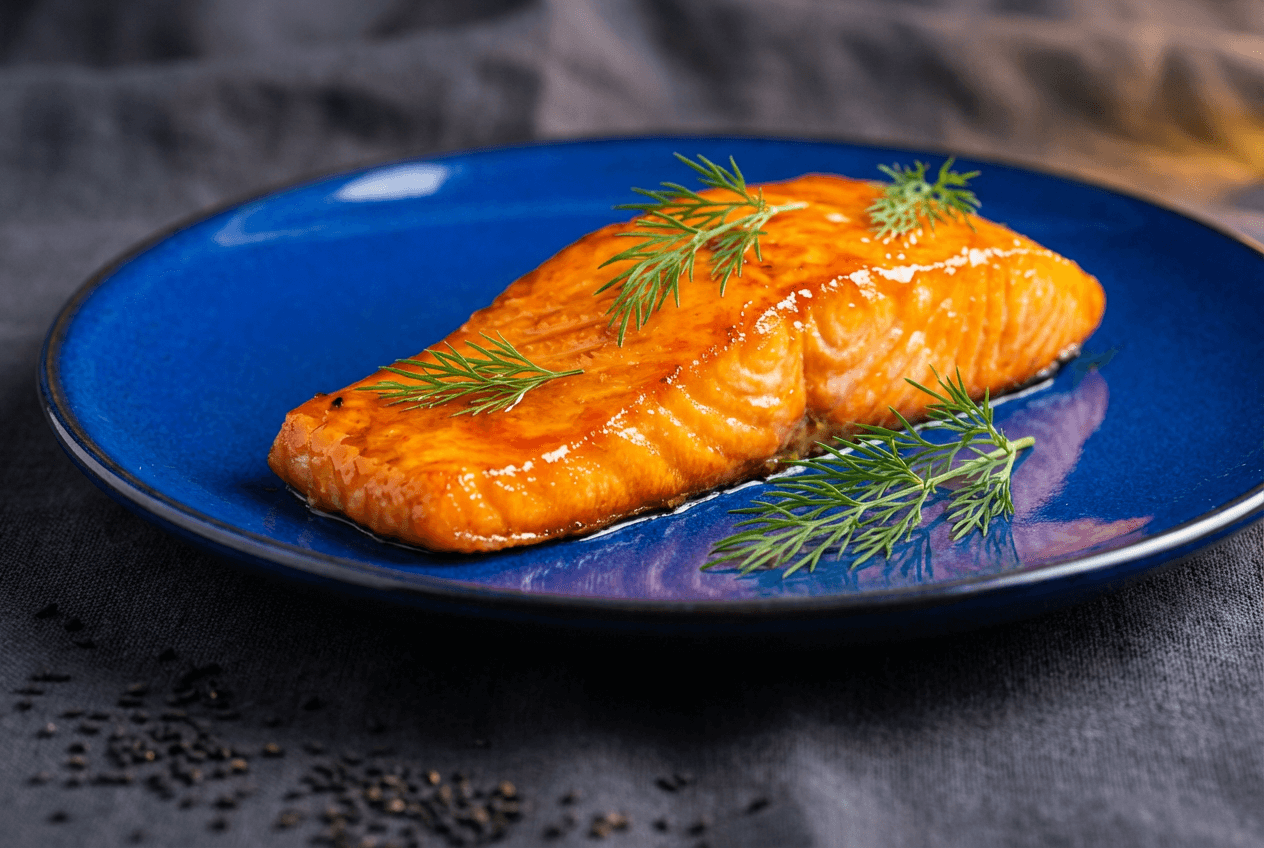 Complementary color theory in food photography showing orange glazed salmon on deep blue plate for maximum contrast
Tip 7: Shoot More Than You Think You Need
Take at least 30–50 photos per dish. Professionals shoot hundreds.
Between shots, make tiny adjustments: shift a garnish, rotate the plate 10 degrees, move a prop slightly left. Bracket your exposure — one at normal, one a stop brighter, one a stop darker. You'll be shocked at how different the same scene looks with minor tweaks.
Always review on a larger screen later. What looked perfect on a 6-inch phone screen often reveals something you missed on a laptop — a stray crumb, a shadow you didn't notice, a slightly tilted horizon line.
The cost of taking extra shots is literally zero. The cost of not having the perfect version when you need it? That's the kind of food photography mistake that keeps biting restaurant owners.
🎯 Pro Shortcut: Skip the Reshoot With AI Angle and Lighting Adjustments
Shot your dish from the wrong angle? Lighting too flat? Instead of restyling and reshooting, FoodShot AI lets you adjust camera angles and change lighting styles on photos you've already taken. Upload once, then generate multiple versions with different angles and lighting — no tripod required.
Part 2: Food Styling Tips — Make the Dish Look Irresistible
Styling is the difference between a snapshot and a photo that makes people physically hungry. You don't need to be a professional food stylist to use these techniques — but knowing how to take better food photos through styling means your food looks intentional rather than accidental.
Tip 8: Style in Odd Numbers
Groups of 3, 5, or 7 items look more natural and dynamic than even numbers. This applies to everything: three basil leaves instead of four, five scattered berries instead of six, three supporting dishes around your hero.
Odd numbers create asymmetry, and the human eye finds asymmetry more interesting than perfect balance. It feels organic rather than forced.
The triangle trick: Arrange three main elements in a triangle formation. This instantly creates a balanced-but-not-boring composition that leads the viewer's eye around the frame. It works for flat lays, angled shots, and even table spreads.
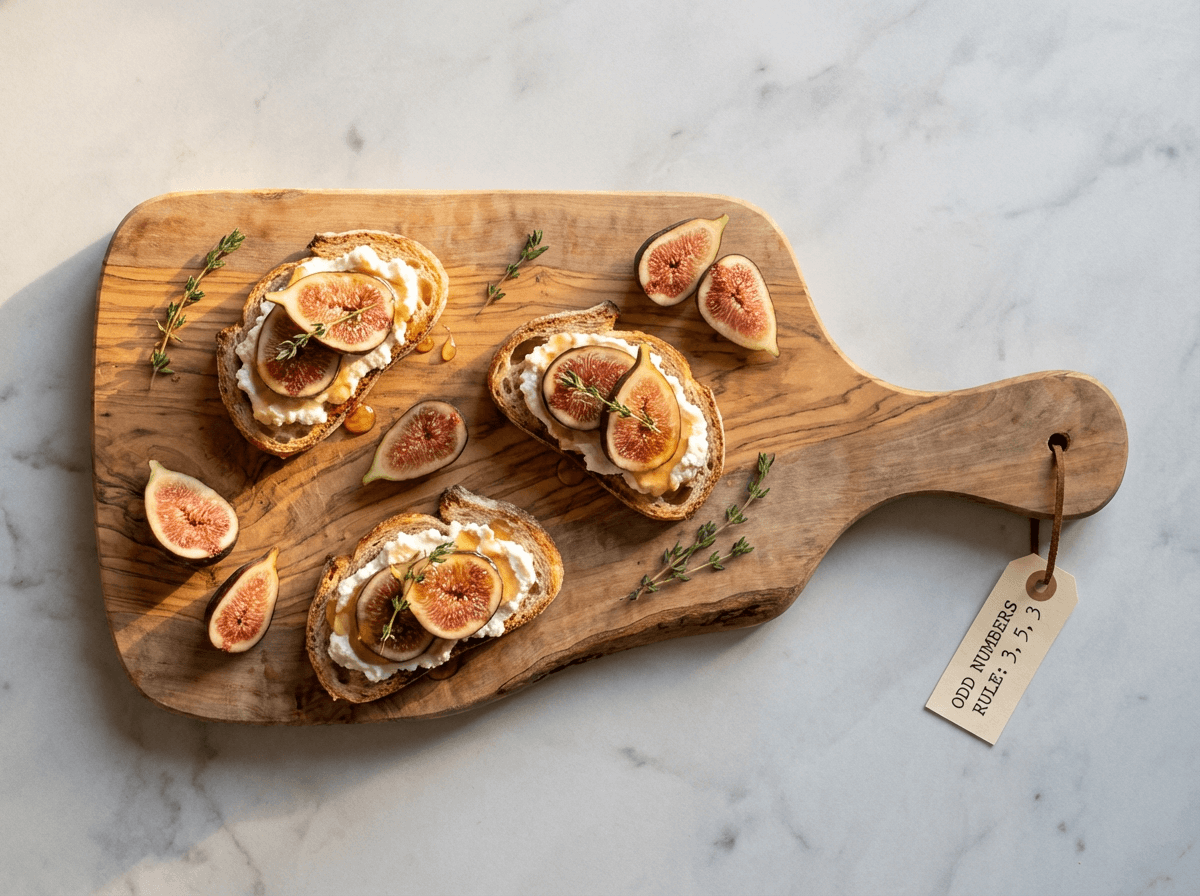 Food styling odd numbers rule with three crostini arranged in triangle formation on olive wood board
Tip 9: Give Your Hero Dish the Spotlight
Every food photo needs a star. One dish commands attention — everything else plays a supporting role.
Place your hero at the strongest focal point (remember those rule-of-thirds intersections). Use shallow depth of field to keep the hero sharp while surrounding elements go slightly soft. If you're shooting with a phone, try using portrait mode to approximate this effect.
Supporting dishes and props should be partially cut off at the frame edges. This keeps them from competing for attention while adding context and fullness to the scene. Think of them as extras in a movie — present but not stealing the show from your hero dish.
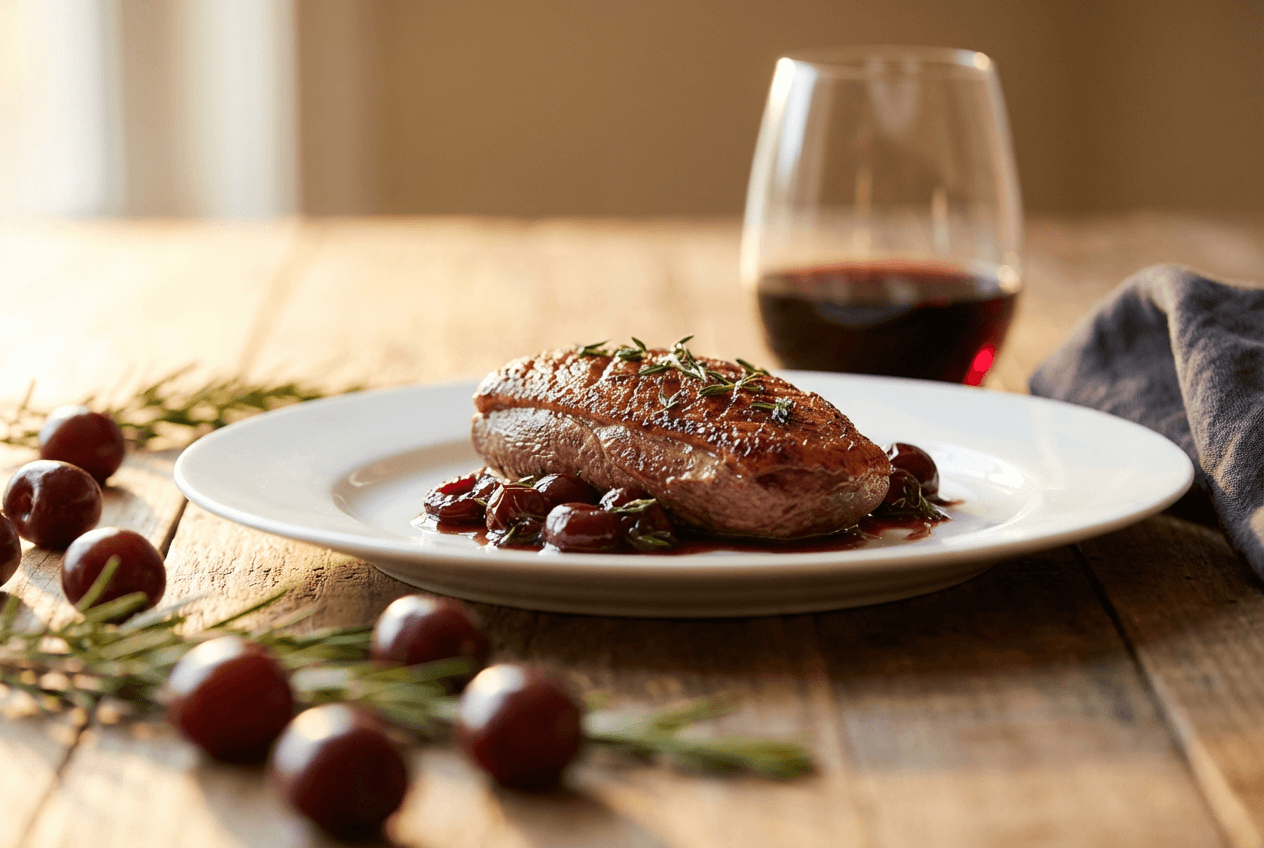
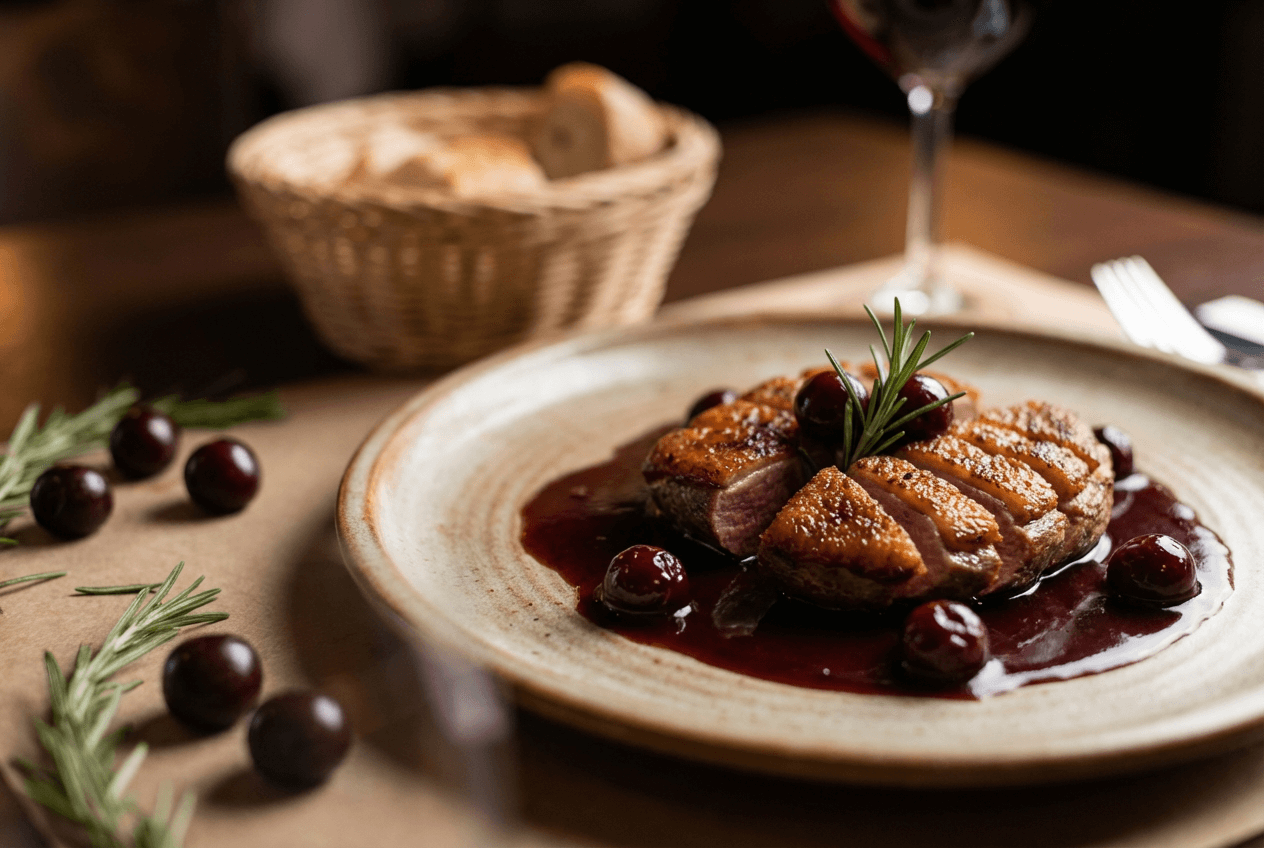 Hero dish food photography composition with sharp-focus duck breast and blurred supporting props demonstrating focal hierarchy
Tip 10: Drizzle Sauces and Dressings Last — Literally Last
Sauces are the most time-sensitive element in food styling. A drizzle of chocolate ganache or balsamic reduction looks glossy and gorgeous for about 45 seconds before it flattens, absorbs, and loses its sheen.
The protocol: Set up your entire scene, get your camera angle locked, adjust your settings, and then — seconds before shooting — add the sauce. Use a squeeze bottle for precise control. Spoons are unpredictable.
Chocolate, caramel, and cream-based sauces photograph best when slightly warm (they flow more attractively). Vinaigrettes and oils look best drizzled from about 12 inches above the dish for that natural "just-poured" look.
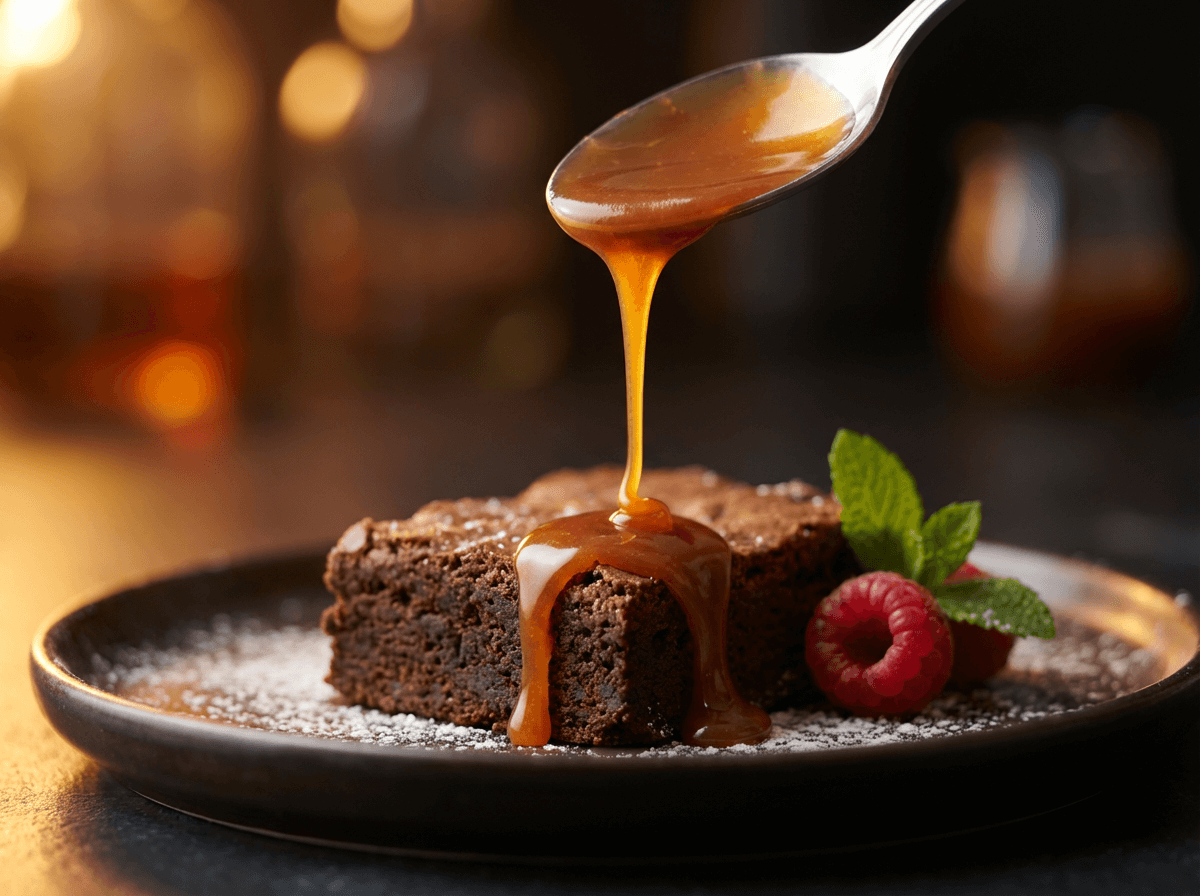 Caramel sauce being drizzled onto chocolate brownie dessert showing precise sauce timing for food photography
Tip 11: Fake the Steam (Everyone Does It)
Steam rising from a dish triggers an immediate "freshly cooked, warm, delicious" response. It's one of the most powerful appetite cues in food photography. And yes, professionals fake it constantly.
Method 1: Microwave a wet cotton ball or small sponge for 30 seconds. Tuck it behind the dish, just out of frame. The rising steam looks completely natural on camera.
Method 2: A handheld garment steamer held just off-camera gives you precise, controllable steam that you can direct exactly where you want it.
Key detail: Steam really shows up best against dark backgrounds. If you're shooting on a white surface, the steam will be nearly invisible. Switch to dark wood, black slate, or a dark fabric backdrop for those steamy hero shots.
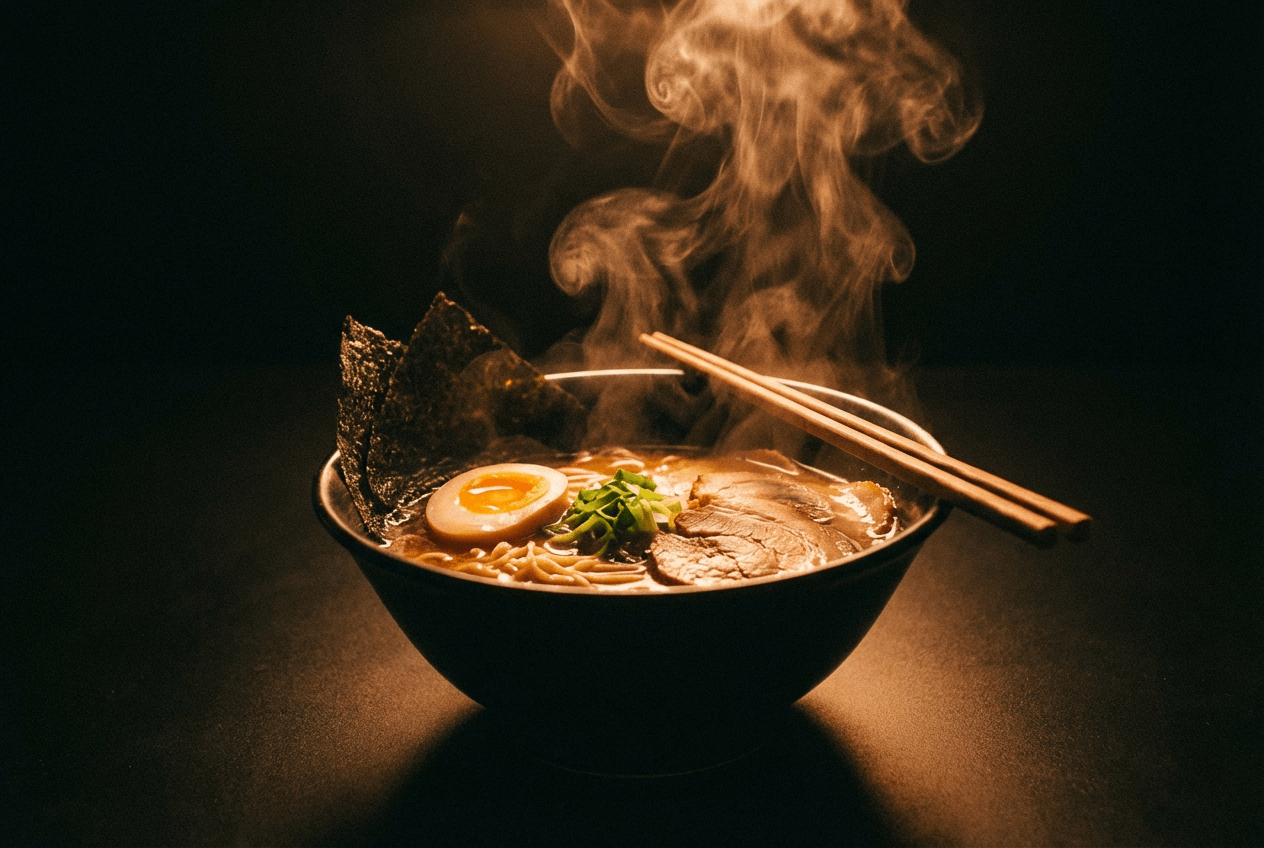 Steaming ramen bowl with visible steam against dark background demonstrating backlight and steam food photography technique
Tip 12: Keep Everything Looking Fresh
Food wilts, melts, and dies under lights faster than you'd expect. Professional food photographers have a toolkit of tricks to help keep things looking alive:
- Mist herbs and produce with a spray bottle for that dewy, just-picked look
- Lightly brush leafy greens with cooking oil so they glisten under the light
- Slightly undercook proteins — they hold their color and shape better for photos (fully cooked meat tends to shrink and turn grey)
- Replace garnishes every few minutes — basil wilts in about 3 minutes under warm light, and lettuce goes limp just as fast
The freshness rule is simple: if something looks tired, swap it out. Always have backup garnishes ready. The few cents you spend on extra herbs will really help you avoid dull, lifeless photos.
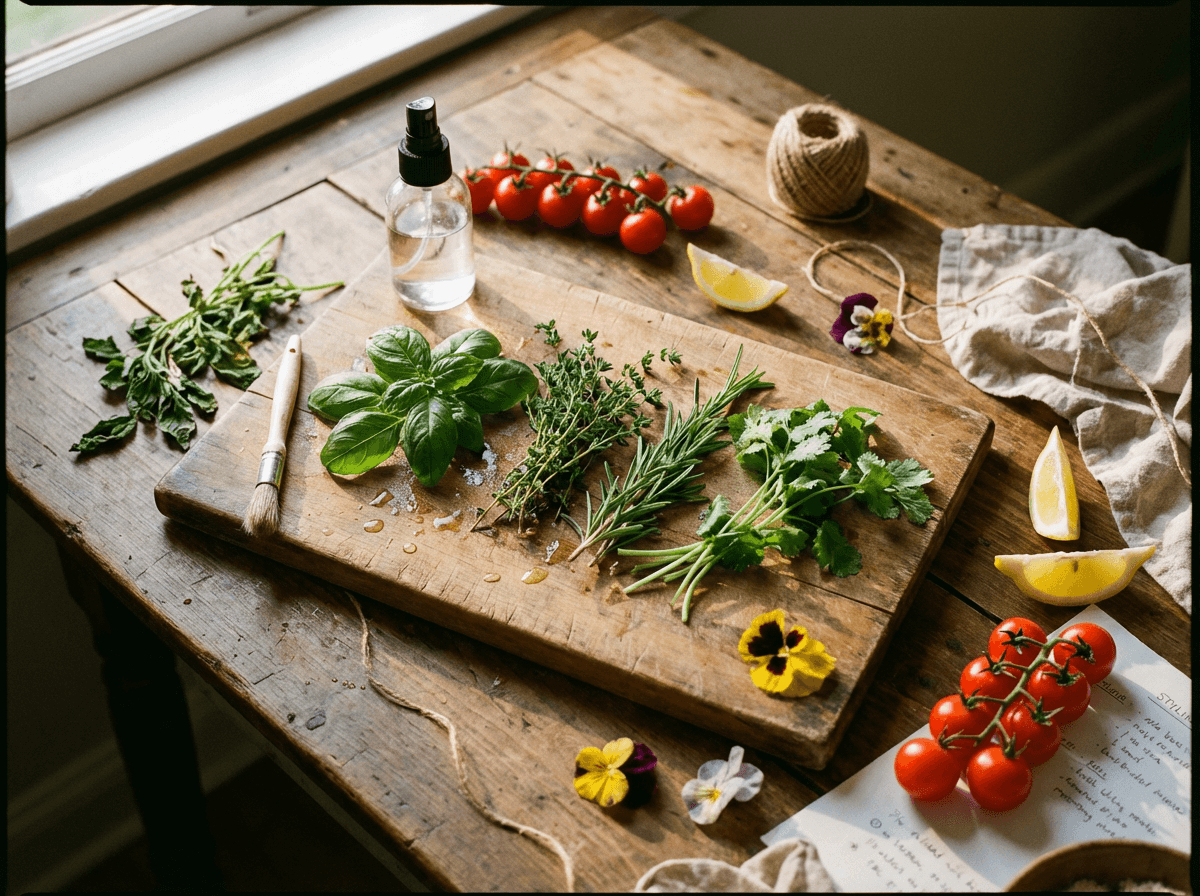 Food styling prep station with fresh herbs, spray bottle, and garnish supplies for keeping food looking vibrant
Tip 13: Choose Plates That Contrast Your Food
Your plate choice can make or break a shot. Here's the quick guide:
White/neutral plates: The safe, versatile choice. Clean lines, don't compete with the food, work for nearly any cuisine. If you own one set of dishes for photography, make them white.
Dark plates (black ceramic, dark slate, charcoal stoneware): Make bright, colorful food absolutely explode. A vibrant curry on a matte black plate? Stunning. But dark dishes on dark plates disappear — try to avoid that.
Patterned plates: Almost always a mistake for food photography. The pattern competes with the dish for visual attention.
Match texture to cuisine: Rustic stoneware for comfort food and homestyle cooking. Clean, minimal white for fine dining. Wooden boards for artisan bread and charcuterie. The plate tells a story about what kind of food this is before the viewer even focuses on the dish.
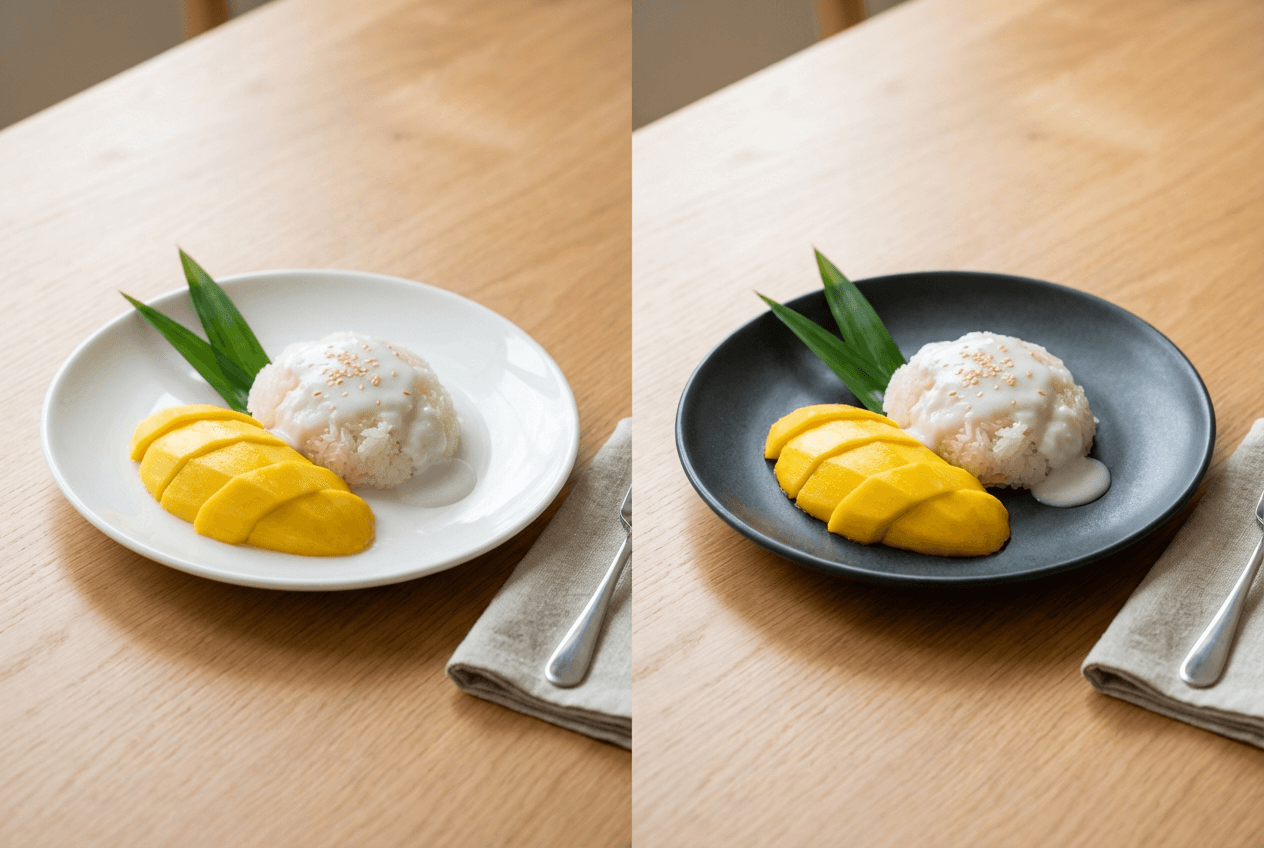 Food photography plate comparison showing colorful mango sticky rice on white versus dark plate demonstrating contrast
Tip 14: Build Layers and Depth With Props
A great food photo has three planes: foreground, middle ground, and background. Using these layers creates a sense of depth that really pulls the viewer into the scene.
Foreground: Scatter a few ingredients — a pinch of flour, some whole spices, a small herb sprig. Keep them slightly out of focus for a professional look.
Middle ground: This is where your hero dish lives. Sharpest focus goes here.
Background: A napkin, a utensil, the edge of another plate, or a hand reaching in. Soft focus, just enough to add something without creating distraction.
Use height to your advantage too — stack a cutting board under your dish to elevate it slightly, or use books under a background element to add dimension. Props like linen napkins, vintage utensils, raw ingredients, and a glass of wine all help tell a story. Just don't overdo it — three to five supporting props is usually the sweet spot.
 Layered food photography composition showing foreground props, sharp hero dish, and blurred background elements creating depth
🎯 Pro Shortcut: AI Styling Without Restyling
Don't have the right plate? Garnish looking wilted? Background cluttered? FoodShot AI lets you swap plates, add garnishes, remove unwanted elements, and replace backgrounds completely — all from a single photo. You can even upload a Pinterest reference photo and clone its entire styling, lighting, and composition onto your dish. No reshooting, no re-plating.
Part 3: Editing Food Photography Tips — Polish Without Overdoing It
Editing is where good photos become great photos. But the goal is enhancement, not transformation — if your editing is visible, you've gone too far. These food photography tips work in any editing app, from Lightroom to Snapseed to your phone's built-in editor.
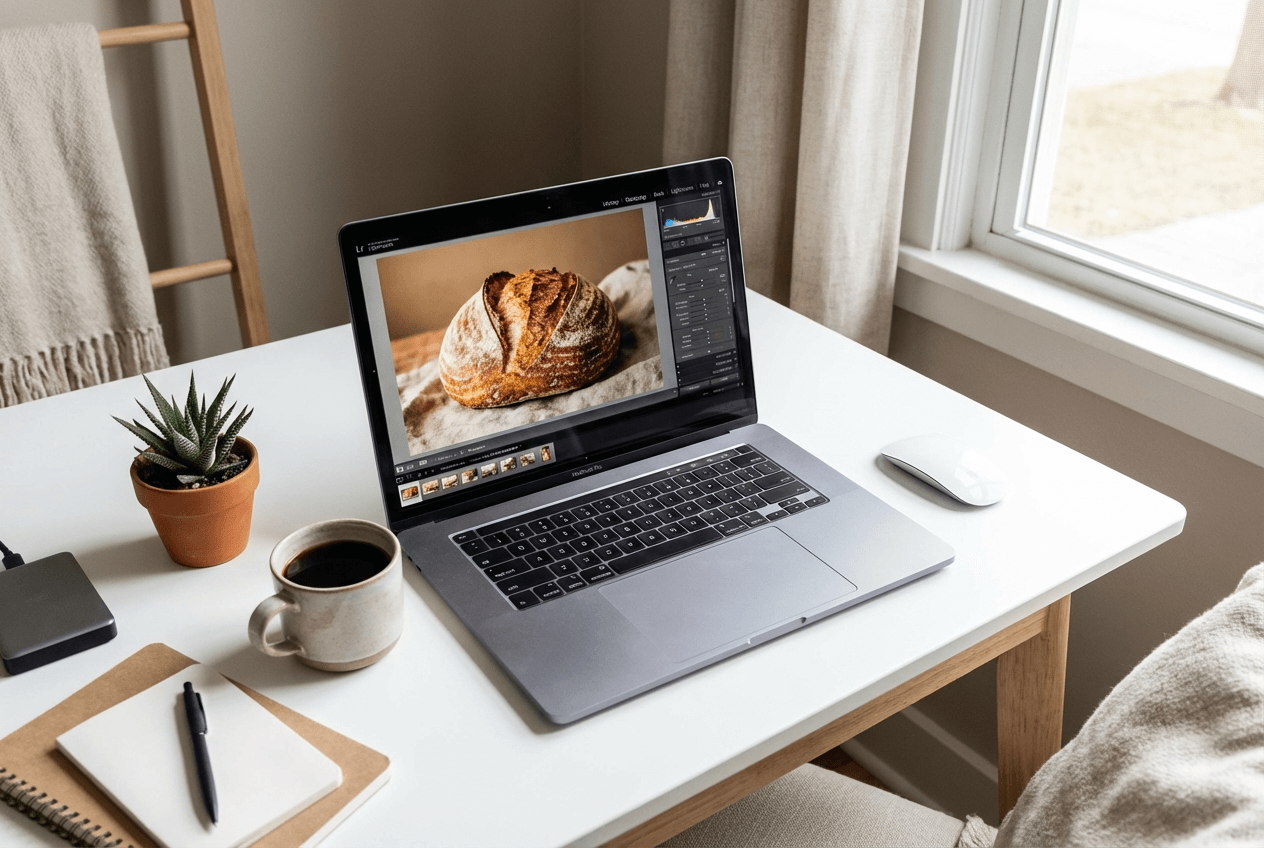 Food photography editing workspace showing laptop with photo editing software adjusting white balance and exposure
Tip 15: Fix White Balance Before Anything Else
White balance is the foundation of every other edit. Get this wrong and no amount of vibrance or contrast will save you.
Food shot under warm tungsten lights looks orange. Food under fluorescent lights looks green. Neither looks appetizing. A correct white balance makes whites actually look white, and food shows its true color.
The sweet spot for food: Slightly warm — around 5500–6000K on the color temperature slider. This setting feels inviting and natural. Anything cooler (bluer) really makes food look clinical. Think hospital cafeteria versus golden-hour dinner.
Most editing apps have a white balance eyedropper tool. Click on something in the frame that should be white (a plate, a napkin) and it auto-corrects. Start there, then fine-tune by using the temperature slider.
Tip 16: Brighten Up — Slightly Overexposed Sells
Food photos that are slightly brighter than reality feel more appetizing. This is backed by every food delivery platform guide and commercial food photography standard.
Lift your exposure by +0.3 to +0.5 stops. Then raise the shadows slider to reveal texture in darker areas — the caramelization on an onion, the char on a grilled pepper, the layers inside a croissant.
The limit: Don't blow out your highlights. If the white plate becomes a featureless white blob, you've gone too far. Pull the highlights slider down to recover detail. The sweet spot is bright food on a plate that still has visible edges and shadow.
Tip 17: Use Vibrance, Not Saturation
This is the editing tip that separates amateurs from pros when learning how to take good food photos.
Saturation boosts every color equally. Crank it up and skin tones turn orange, reds become nuclear, and food starts looking artificial. It's a blunt instrument.
Vibrance selectively boosts muted colors while leaving already-vivid colors alone. It makes greens greener and browns richer without turning your tomato sauce radioactive. It's the smart tool.
A vibrance bump of +15 to +25 is usually enough to make food pop without looking edited. Over-saturated food triggers immediate distrust — viewers know it won't look like that in real life, and you've just lost credibility. Try using vibrance first and only touch saturation if you really need a stronger push.
 Vibrant acai bowl photographed overhead with natural color vibrance showing proper food photo editing balance
Tip 18: Use Selective Edits to Guide the Eye
Most editing apps now support selective adjustments — and they're incredibly powerful for food photos.
Radial filter: Draw a circle around your hero dish and increase the exposure by +0.3. Then decrease exposure on everything outside it by -0.2. Your dish now subtly glows while the surrounding scene recedes. The viewer's eye goes straight to the food.
Vignette: A slight darkening of the frame edges draws the eye inward naturally. Keep it subtle — a -10 to -15 vignette setting is plenty. Anything heavier looks like you shot through a toilet paper roll.
Selective sharpening: Apply sharpening only to the food area. Leave backgrounds and props soft. Using selective sharpening mimics the natural depth-of-field look of expensive camera lenses and focuses attention where it belongs.
Tip 19: Clean Up the Background
Look at your photo on a big screen and ask: is there something here that doesn't need to be here?
Crumbs on the table. A fingerprint smudge on the plate rim. A distracting power outlet in the background. That random fork that drifted into frame.
Every editing app has a healing or clone stamp tool. Use it. Remove anything that pulls attention away from the food. If an element doesn't add to the story your photo is telling, it's subtracting from it.
This step takes 30 seconds and is the difference between a photo that feels polished and one that feels like a snapshot. Try making background cleanup a habit on every single food photo you edit — it's really one of the most impactful editing steps.
Tip 20: Export for the Right Platform
You've shot beautifully, styled intentionally, and edited with skill. Don't ruin it by using the wrong export settings.
Instagram Feed: 1080×1080px (square) or 1080×1350px (4:5 portrait — takes up more screen space, better engagement). Check Instagram's official guidelines for the latest specs.
Instagram Stories/Reels: 1080×1920px (9:16 vertical)
Uber Eats / DoorDash: Minimum 1200×800px, landscape orientation preferred. Both platforms recommend well-lit, tightly cropped shots with the dish filling at least 70% of the frame. Check the latest delivery platform photo guide for current specs.
Website/Menu: At least 2000px on the longest edge for sharp display on retina screens.
Compression: Export as JPEG at 80–85% quality for the best balance of file size and sharpness. Going below 75% introduces visible compression artifacts that are really noticeable on food textures.
🎯 Pro Shortcut: One-Click AI Editing and Platform-Ready Export
Manual editing takes 15–30 minutes per photo. FoodShot AI handles white balance correction, lighting adjustment, background cleanup, and platform-specific formatting in about 90 seconds. Choose from 30+ style presets (Delivery, Restaurant, Fine Dining, Instagram) and generate social media posters and templates sized for every platform. At a fraction of the cost of professional editing, it's the fastest path from smartphone snap to menu-ready image.
Your Complete Food Photography Tips Checklist
Bookmark this. Before your next food photo shoot, run down through this list:
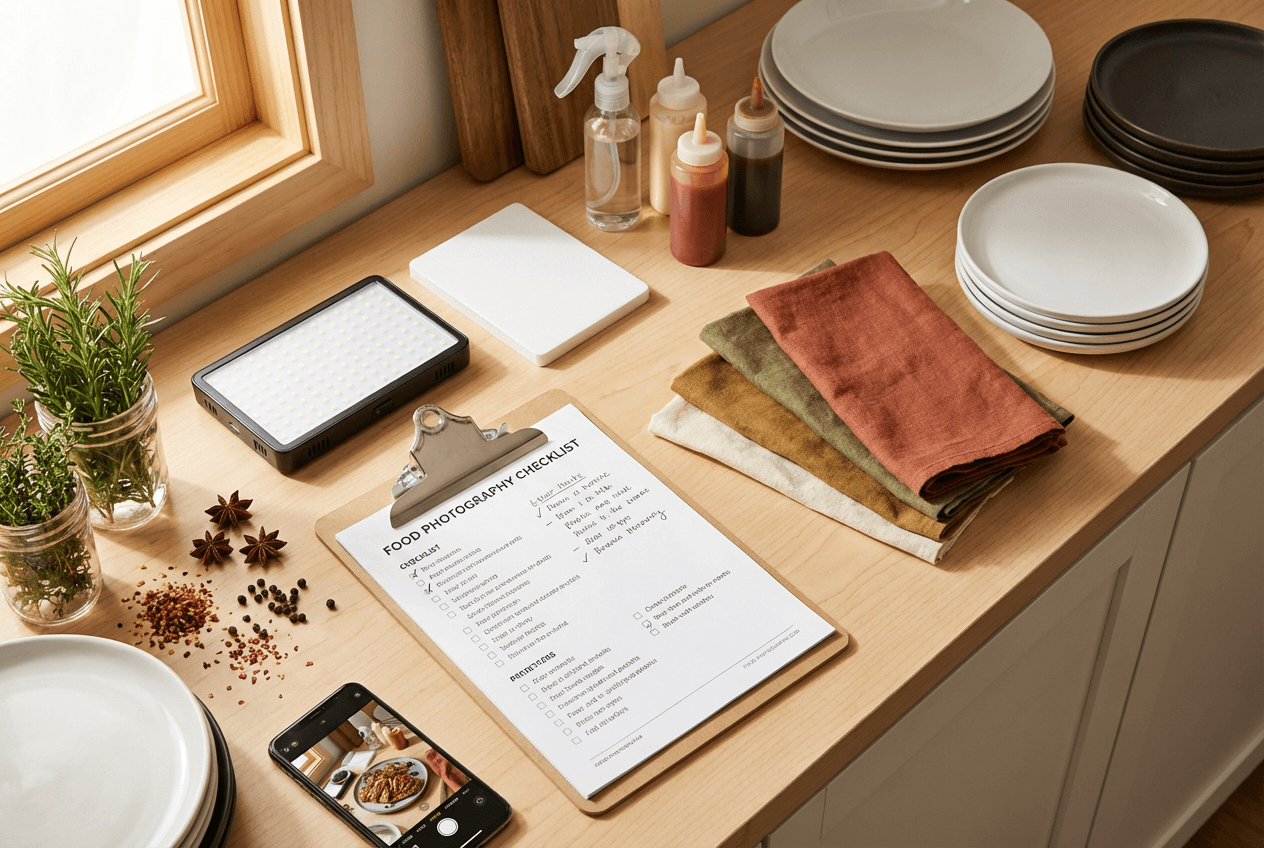 Food photography checklist and preparation scene with organized tools, plates, props, and styling supplies ready for a shoot
Before You Shoot:
- Find your best natural light source (window, not overhead)
- Turn off all artificial room lights
- Choose the right plate (contrast with food color)
- Gather props: napkin, utensils, raw ingredients, cutting board
- Have backup garnishes ready
While Shooting:
- Light from the side or back — never the front
- Match camera angle to dish type (flat lay / 45° / eye level)
- Enable grid overlay and use rule of thirds
- Leave negative space for a clean composition
- Style garnishes in odd numbers (3, 5, 7)
- Make one dish the clear hero
- Add sauces and drizzles last (right before clicking)
- Fake steam if needed (wet cotton ball or steamer)
- Shoot 30+ photos with small variations
While Editing:
- Fix white balance first (aim for slightly warm)
- Brighten exposure by +0.3 to +0.5 stops
- Boost vibrance (+15 to +25), not saturation
- Apply selective brightness to hero dish
- Clean up crumbs, smudges, and distractions
- Export at correct dimensions for your target platform
Or skip half this list — upload your photo to FoodShot AI and let AI handle the lighting, styling, and editing in 90 seconds. Plans start at $15/month for 25 images with commercial license.
Frequently Asked Questions
What's the best camera for food photography?
Your smartphone is genuinely good enough for most restaurant and social media food photography in 2026. The iPhone 16 Pro, Samsung Galaxy S25 Ultra, and Google Pixel 9 Pro all shoot food photos that can rival entry-level DSLRs — especially in good lighting. If you want to step up, try a mirrorless camera (like the Sony a6400 or Canon EOS R50) with a 50mm or 35mm prime lens for beautiful background blur and sharper detail. But lighting and composition matter far more than the camera body — a $200 phone with great window light will really outperform a $2,000 camera under bad fluorescent lights every time.
How do I take good food photos with my phone?
Three things will immediately improve your phone food photography: (1) shoot near a window using natural light and turn off overhead lights, (2) use the 45-degree angle for most dishes, and (3) clean your lens before shooting — fingerprints on phone lenses are the #1 reason phone food photos look hazy. For more detailed phone-specific techniques, check out our iPhone food photography guide with 15 pro tips.
What's the best lighting for food photography?
Indirect natural window light, hitting the food from the side or back. Overcast days actually produce the most flattering food light because clouds act as a giant diffuser — you get soft, even illumination with no harsh shadows. If you need something artificial, try using a daylight-balanced LED panel (5000–5500K) positioned to one side, with a white bounce card on the opposite side to help fill shadows. For more on lighting setups, check out our 90-second cafe menu photography guide.
How do I make my food photos look professional?
Focus on three things: consistent lighting (side-lit natural light), intentional composition (rule of thirds, negative space), and restrained editing (correct white balance, slight brightness boost, vibrance not saturation). Professional food photos look professional because they're consistent — same lighting direction, same editing style, same level of care in every shot. That consistency builds a brand aesthetic that looks polished and trustworthy. Using the same editing presets across all your photos really helps maintain that consistent look.
Can AI replace traditional food photography?
AI won't replace a styled studio shoot for a high-end cookbook or national advertising campaign — those still need a human photographer, stylist, and art director. But for the vast majority of restaurant, delivery platform, and social media photography, AI food photography tools now deliver results that are visually indistinguishable from professional shots at a fraction of the time and cost. The smart approach in 2026: shoot a decent photo using good lighting, then let AI handle the styling and editing. Best of both worlds.