Best iPhone Camera Settings for Food Photography (2026)

Your iPhone camera is genuinely impressive — but it ships with settings optimized for general photography, not food. A few targeted iPhone camera settings for food photography can mean the difference between a flat, lifeless menu photo and an image that makes someone tap "Order Now."
Quick Summary: Dial in your iPhone's grid overlay, exposure lock, and format settings before you shoot a single dish. Use the 2x telephoto lens for individual plates, Portrait mode for hero shots, and Macro mode for texture close-ups. For tricky lighting (dim restaurants, harsh windows), lock exposure manually and adjust white balance with a third-party app like Halide. Then run your best shots through FoodShot AI to get professional-grade results in 90 seconds.
Essential iPhone Camera Settings to Change Right Now
Before you photograph a single plate, open Settings > Camera and make these changes. These baseline iPhone food photography settings apply whether you're shooting for delivery apps like Uber Eats and DoorDash or your restaurant's Instagram feed.
Turn on the Grid. This overlays a 3×3 rule-of-thirds grid on your viewfinder. For food photography, it does double duty: it helps you compose balanced shots and displays a crosshair level indicator when you tilt the phone straight down — essential for overhead flat-lay photos where even a slight angle looks off.
Set your format. Go to Settings > Camera > Formats:
- High Efficiency (HEIF): The default. Smaller file sizes with visually identical quality to JPEG. Use this for everyday food shots and social media images.
- Apple ProRAW (iPhone 12 Pro and newer): Captures dramatically more color and exposure data. Choose this when lighting is tricky — like a dim restaurant or harsh window light — because it gives you far more room to recover highlights and lift shadows in editing. The trade-off: files are 10–12× larger (roughly 25MB per photo). Apple's ProRAW support page lists compatible models.
Turn off Live Photos. Live Photos capture 1.5 seconds of motion before and after each shot. That's useful for one specific food scenario — capturing the perfect frame of a sauce pour or cheese pull — but otherwise it just eats storage. For everyday iPhone food photography, switch it off by tapping the concentric circles icon in the Camera app.
Leave Smart HDR on. Your iPhone's Smart HDR automatically merges multiple exposures to preserve detail in both bright highlights and dark shadows. For food photos — especially when shooting near a bright window — this prevents your white plates from blowing out while keeping shadow detail in darker ingredients.
Use Camera Control (iPhone 16). The physical Camera Control button on iPhone 16 models lets you quickly swipe to adjust exposure or zoom without touching the screen. During a fast-paced restaurant shoot, this is genuinely faster than the on-screen controls. Press lightly to cycle between exposure, depth, and zoom — then swipe to adjust.
Mastering Exposure and Focus for Food Photos
The single most impactful skill in iPhone food photography? Learning to control exposure and focus independently. This applies to every iPhone model — no special app or lens required.
Lock focus and exposure (AE/AF Lock). Tap and hold on your dish until you see the yellow AE/AF LOCK banner at the top of the screen. This tells the camera: "Don't refocus, and don't re-meter." Without this, your iPhone constantly re-evaluates both — and a slight hand movement can shift focus from your beautifully garnished entrée to the napkin behind it.
Fine-tune brightness with the exposure slider. After tapping to focus, swipe up to brighten the image or down to darken it. This is critical for food photography because:
- White plates on dark surfaces: The camera tries to average the scene and overexposes the plate. Tap the plate, then swipe down about 15–20% to recover detail in that white porcelain.
- Dark bowl on bright tablecloth: The opposite problem — the camera darkens the food to compensate for the bright surroundings. Tap the food, swipe up to brighten the dish.
- General rule for food photos: When in doubt, slightly underexpose. It's easier to brighten shadows in editing than to recover blown-out highlights.
For more on composition and lighting after you've nailed these settings, check out our complete guide to iPhone food photography tips.
Photographic Styles: The Hidden Food Photography Tool
Available on iPhone 13 and newer (not just Pro models), Photographic Styles are real-time adjustments applied during image capture — not post-processing filters. They intelligently alter tone and color temperature without affecting food color accuracy the way heavy-handed filters do.
To access them: open the Camera app, tap the stacked-squares icon (between Live Photos and aspect ratio), then swipe through the presets.
Best Photographic Styles for food photography:
| Style | Best For | Tone/Warmth Setting |
|---|---|---|
| Vibrant | Colorful dishes — poke bowls, salads, acai bowls | Tone: Vibrant, Warmth: Neutral |
| Warm | Comfort food — pasta, baked goods, coffee | Tone: Rich, Warmth: +20–30% warm |
| Standard | Dishes you plan to heavily edit in post | Keep both at center (0) |
Avoid the Cool style for food — blue undertones make food look unappetizing. This is one of the most common food photography mistakes that kill online orders.
Which Camera Mode Works Best for Food?
Your iPhone offers several shooting modes. Here's when each one actually helps with food photography:
Photo Mode (Your Default) The standard shooting mode gives you the most control. You get full access to exposure lock, focus lock, the exposure slider, and all lenses. Use this for 80% of your food photos — menus, social media posts, delivery app listings.
Portrait Mode (Hero Shots) Portrait mode simulates the shallow depth-of-field look that makes professional food photography so striking — the dish is tack-sharp while the background melts into a creamy blur. Tips for food:
- Position your iPhone 2–8 feet from the dish (closer and Portrait mode can't detect the subject)
- After shooting, tap Edit and adjust the f-number: f/2.8–f/4 gives a natural-looking blur for food images. Lower (f/1.4) looks artificial; higher (f/8+) reduces the effect too much
- Works best on single plated dishes — struggles with flat-lays and table spreads
- Ideal for "hero shots" on your website, Instagram feed, or cafe menu visuals
Macro Mode (Texture Close-Ups) Available on iPhone 13 Pro and newer, plus all iPhone 16 models. The camera automatically switches to the Ultra Wide lens when you get within about 2cm of your subject, as detailed in Apple's macro photography guide. Perfect for:
- Texture shots: the crispy edge of a crème brûlée, bubbling cheese on pizza, flaky pastry layers
- Garnish details: herb leaves, sesame seeds, microgreens
- Action details: sauce dripping down the side of a plate
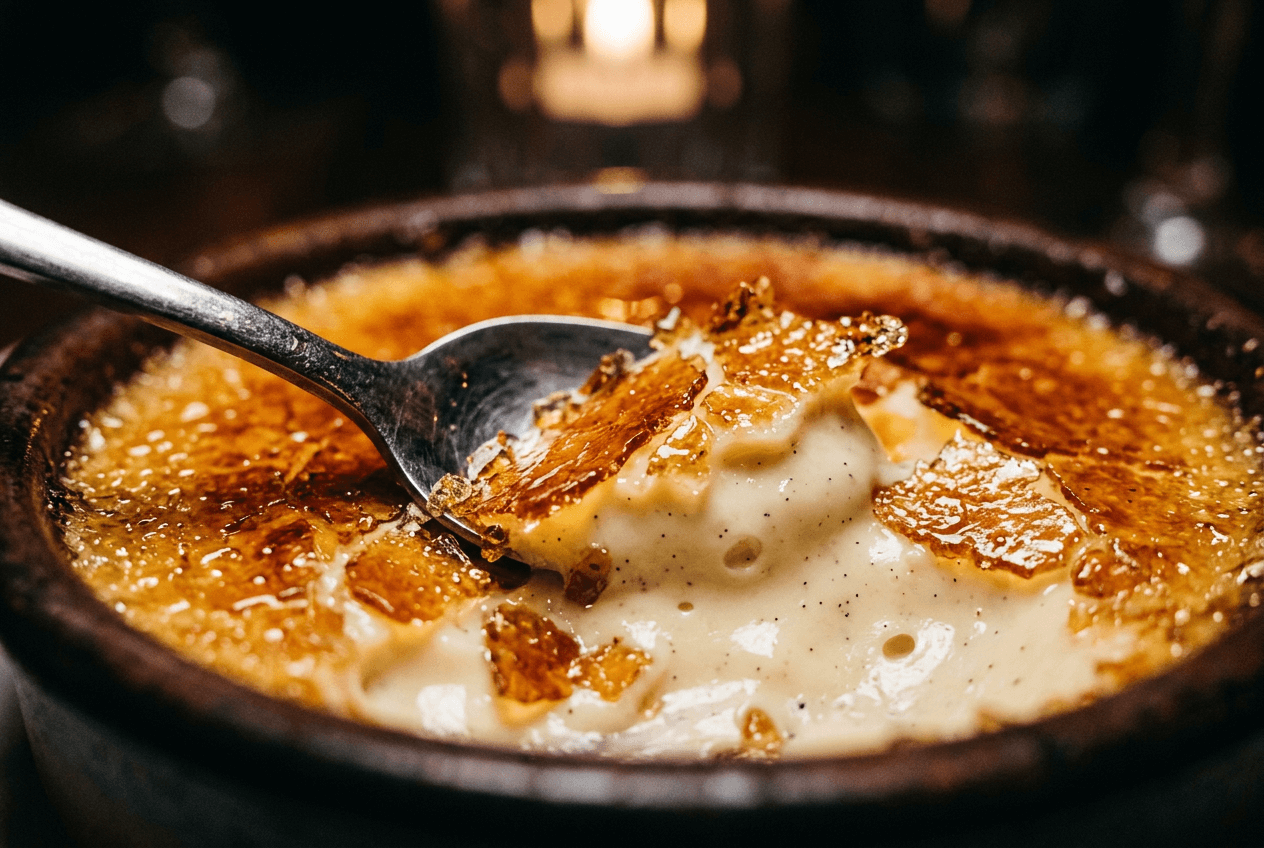 Macro close-up of crème brûlée showing food texture detail perfect for iPhone macro mode
Pro tip: If the automatic lens switching is annoying (the camera bounces between lenses as you move), go to Settings > Camera > Macro Control to add a manual toggle button in the viewfinder.
Lens Selection: Choosing the Right iPhone Camera for Each Dish
Multi-camera iPhones give you several focal lengths. Each distorts and compresses the scene differently — and this matters more for food photography than you'd think.
1x Main Lens (24mm equivalent) Your default and highest-quality lens. Ideal for 45-degree angle shots of individual dishes and most general food photography. Minimal distortion, excellent detail, best performance in low light.
0.5x Ultra Wide (13mm equivalent) Wide field of view with slight barrel distortion at the edges. Use it for:
- Overhead flat-lay photos of table spreads with multiple dishes
- Restaurant ambiance shots with food in the foreground and the dining space behind
- Macro photography (this is the lens that activates for close-ups)
2x Telephoto (48mm equivalent) — The Food Photographer's Favorite On Pro models, this lens is a center crop of the main 48MP sensor, delivering excellent quality. The 48mm focal length is close to the classic 50mm that food photographers have used for decades — and for good reason:
- Slight compression flatters food, making dishes look fuller and more three-dimensional
- Natural perspective without wide-angle distortion
- Perfect working distance: about 1–2 feet from the plate
- Best for: individual plated dishes, menu photos, delivery app images
5x Telephoto (120mm, Pro Max only): The minimum focus distance is too far for most food photography. Skip this lens for food unless you're shooting from across a dining room.
Quick Lens Reference
| Dish Type | Recommended Lens |
|---|---|
| Single plated entrée | 2x (48mm) |
| Burger/sandwich at 45° | 1x (24mm) or 2x (48mm) |
| Full table spread | 0.5x Ultra Wide |
| Overhead flat-lay | 0.5x Ultra Wide or 1x |
| Texture close-up | 0.5x (Macro mode) |
| Tall drink or stacked dessert | 1x at eye level |
iPhone Camera Settings for Common Shooting Scenarios
Here's where your iPhone camera settings for food photography get specific. These are the exact adjustments for the four most common situations you'll face.
Bright Window (Natural Light)
The best-case scenario for food photography. Window light is the gold standard.
 Natural window light food photography setup with reflector for iPhone camera settings guide
- HDR: ON (prevents blowing out the bright window area)
- Lens: 2x for single dishes, 1x for wider compositions
- Exposure: Tap the dish, then slide exposure down slightly (about -0.3 to -0.5 EV) to protect highlights on white plates
- Position: Dish 1–3 feet from window. Place a white foam board or menu opposite the window to bounce fill light into shadows
- Format: HEIF is fine here — plenty of light means less need for RAW flexibility
Dim Restaurant
The trickiest scenario. Low light plus mixed color temperatures (warm overhead lights + cool daylight from windows) create challenging conditions for your iPhone camera.
 Dim restaurant food photography scene showing warm tungsten lighting color cast challenge
- Flash: OFF — always. Flash makes food look flat and institutional. See our guide on food photography mistakes for why flash is the #1 killer
- Exposure: Tap the food, slide up slightly (+0.3 to +0.5 EV) to brighten the dish
- Steadiness: Brace your elbows on the table or prop the phone against a glass. Low light = slower shutter speed = motion blur risk
- Format: ProRAW if available — you'll need the extra editing headroom to fix mixed color casts
- White balance: The native Camera app doesn't offer manual white balance. Use Halide or ProCamera (see below), and set WB to Tungsten or around 3200K to counteract warm overhead lights
- Night mode: If it activates, keep the capture time short (1–2 seconds max) and stay very still
Outdoor Cafe
Gorgeous natural lighting potential, but harsh direct sunlight creates ugly hard shadows on food.
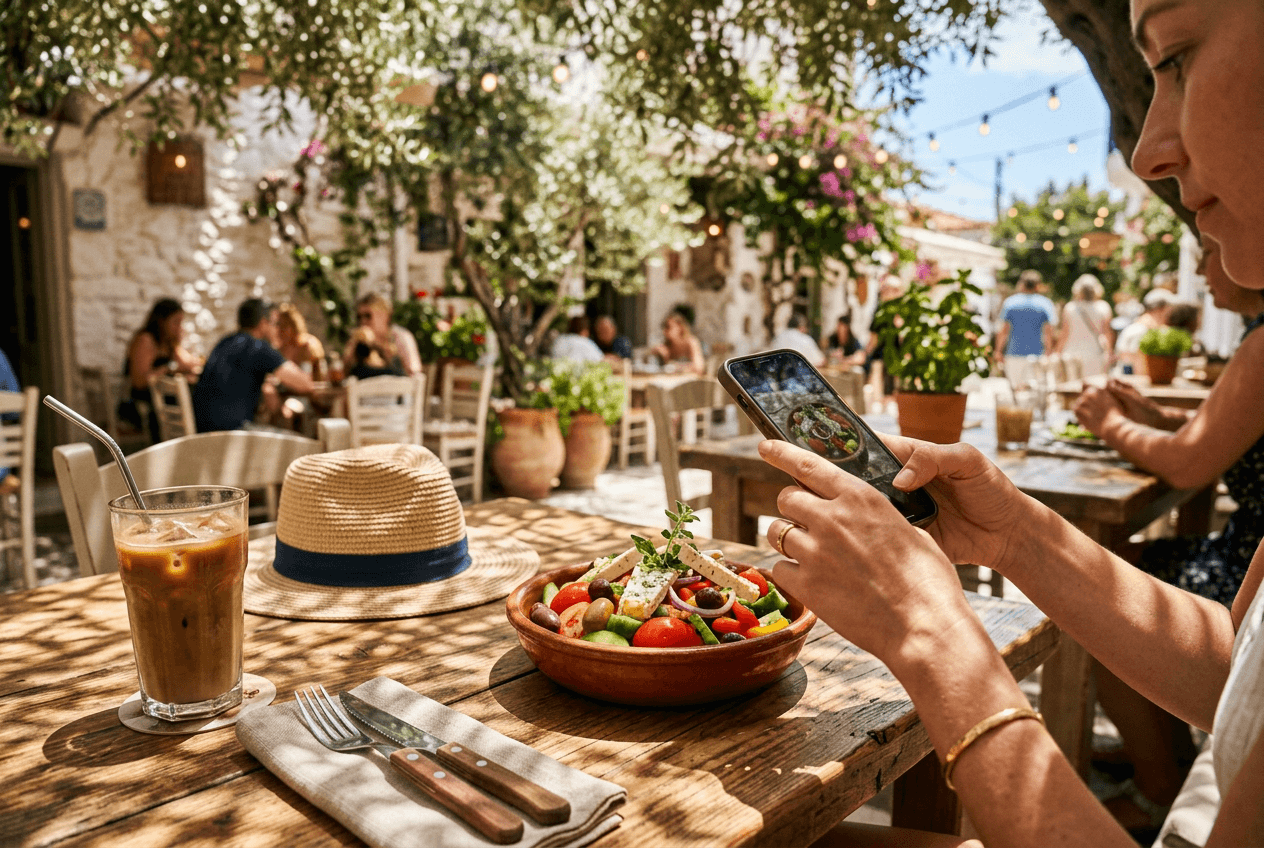 Outdoor cafe food photography in natural dappled sunlight showing ideal shooting conditions
- Seek shade: Move the dish under an umbrella, awning, or tree canopy. Overcast days are ideal — the clouds act as a giant diffuser
- If sunny: Hold a menu or napkin between the sun and the dish to soften the light
- HDR: ON (balances bright sky with shaded food)
- White balance: Auto works well outdoors for natural-looking food photos
- Exposure: Let the camera auto-expose, then fine-tune with the slider
Overhead Flat-Lay
The Instagram classic. Clean, symmetrical, and harder than it looks.
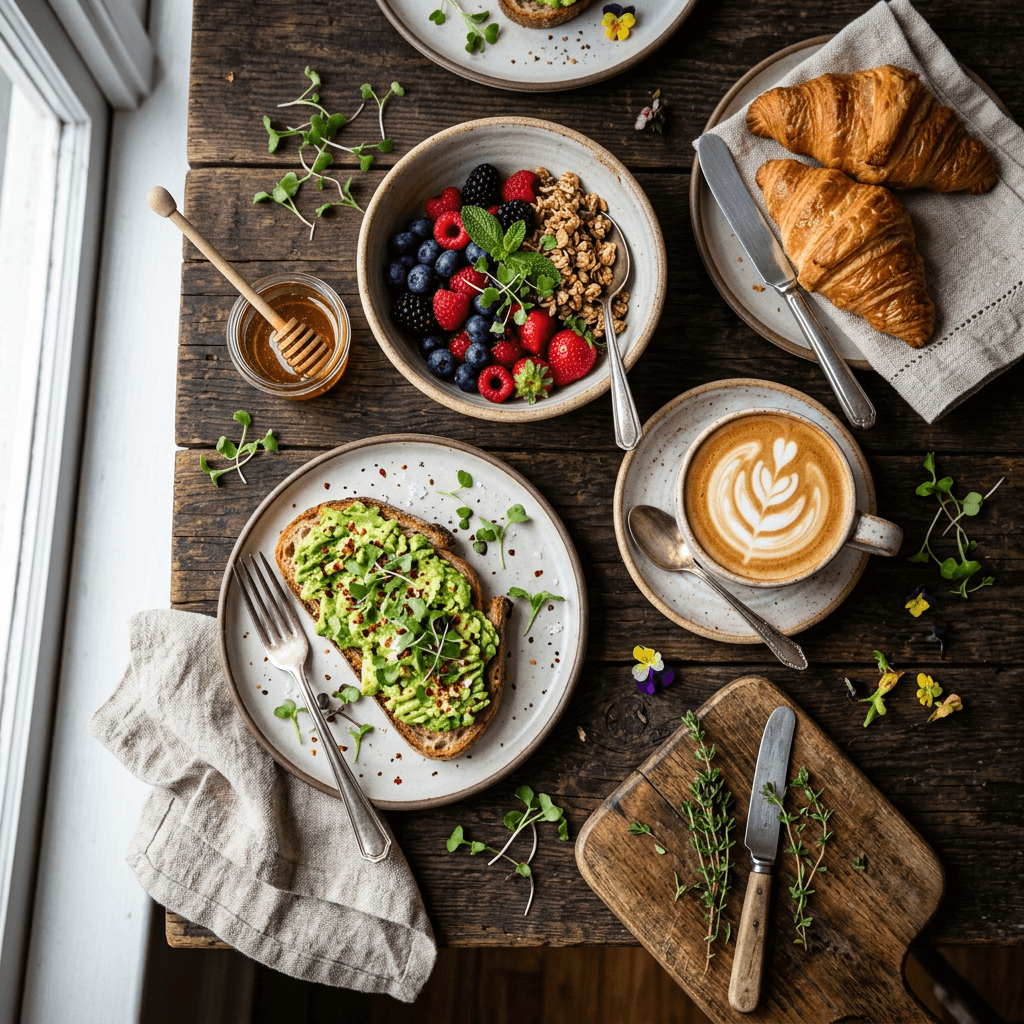 Overhead flat-lay brunch spread showing ideal composition for iPhone food photography
- Grid + Level: Enable Grid in settings. When you point the camera straight down, a crosshair appears — align the two crosses to ensure you're perfectly level
- Lens: 0.5x Ultra Wide to fit the full table, or 1x for a tighter crop
- Lighting: Natural light from one side (a window). Avoid standing where you cast a shadow onto the food
- Tripod: Highly recommended. Even a cheap phone tripod with an overhead arm ($15–30) makes a huge difference
- Exposure: Tap the centerpiece dish and lock (AE/AF Lock)
Video Settings for Food Reels and TikTok
Food video is massive on social media right now. Here's how to set up your iPhone camera for shooting food content:
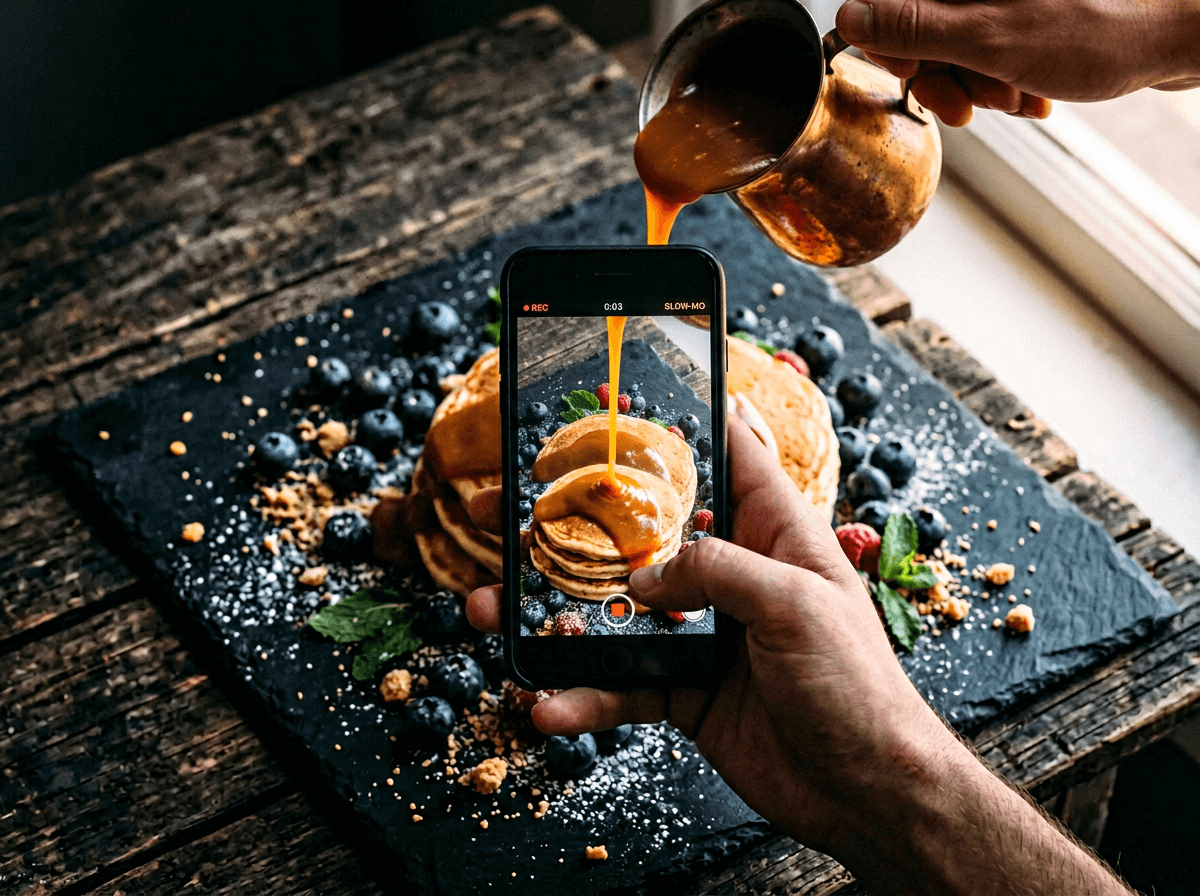 Filming slow-motion food video of caramel sauce pour for Instagram Reels with iPhone
- Resolution: 4K at 30fps delivers the best quality for Instagram Reels and TikTok. If you need smoother motion (someone plating a dish, for example), drop to 1080p at 60fps
- Slow motion: 1080p at 240fps turns a 2-second sauce pour into an 8-second dramatic slow-motion clip. Go to Settings > Camera > Record Slo-mo to set this
- Cinematic mode: Creates a smooth rack-focus effect — great for pulling focus from a garnish to the full dish. Works at 4K 30fps on iPhone 15 and newer
- Orientation: Shoot vertical (9:16) for Reels, TikTok, and Stories. Horizontal (16:9) only for YouTube
- Action mode: Skip it for food. It's designed to stabilize heavy movement and crops the image significantly — not what you want for carefully framed food shots
Third-Party Camera Apps for More Control
The native Camera app is surprisingly good for food photography, but it has one major limitation: you can't independently set white balance, ISO, or shutter speed. If you shoot in challenging light regularly, a third-party app pays for itself immediately.
Halide — The gold standard for manual iPhone photography. Swipe gestures control focus and exposure independently (the native app links them). Manual white balance lets you dial in the exact color temperature for tungsten restaurant lighting. The exposure range extends to ±6 EV compared to Apple's ±2 EV — huge for recovering detail in tricky lighting. Focus peaking highlights exactly what's in sharp focus. Process Zero mode produces unprocessed, natural-looking food images without Apple's computational photography sharpening.
ProCamera — Similar manual controls plus zebra stripes that highlight overexposed areas in real-time. When you're shooting food on white plates, zebra stripes instantly show you if the plate is losing detail. The built-in histogram gives you a second check on exposure accuracy.
Lightroom Mobile (free) — The camera module includes a Professional Mode with manual Exposure, Shutter Speed, ISO, White Balance, and Focus controls. The advantage? You capture and edit in the same app, which streamlines your food photography workflow. The camera module is completely free.
When do you actually need a third-party app? If you mostly shoot near a window with decent natural light, the native Camera app is everything you need. Reach for a third-party app when you're regularly shooting in mixed or artificial lighting (restaurants, events, studios) where manual white balance control is essential. For a broader look at taking better food photos with your phone, see our guide on how to take food photos with your phone.
From Camera Roll to Finished Shot: The Post-Capture Workflow
Even with perfect iPhone camera settings, most food photos benefit from a quick edit. Here's a fast, repeatable workflow:
Step 1: Quick adjustments in iPhone Photos
Open the photo, tap Edit, and try these starting points:
- Exposure: +10 to +20 (slightly brighten)
- Highlights: -50 to -80 (recover detail in bright areas)
- Shadows: +30 to +50 (reveal detail in darker areas)
- Warmth: +10 to +20 (adds an appetizing warm tone)
- Saturation: +5 to +15 (a touch more color — don't overdo it)
Step 2: Know when basic edits aren't enough
Phone editing handles simple exposure and color tweaks well. But it can't swap a cluttered background for a clean one, fix harsh overhead shadows, or transform an okay snapshot into a professional menu-ready image. That's where dedicated food photo editing tools come in.
Step 3: Transform with AI
Upload your iPhone shot to the FoodShot AI food photo editor and choose from 30+ style presets — Delivery, Restaurant, Fine Dining, Instagram, and more. In about 90 seconds, you get a professional-quality result with corrected lighting, enhanced colors, and clean presentation. You can also swap backgrounds, adjust the camera angle, and change the lighting style — all without Photoshop.
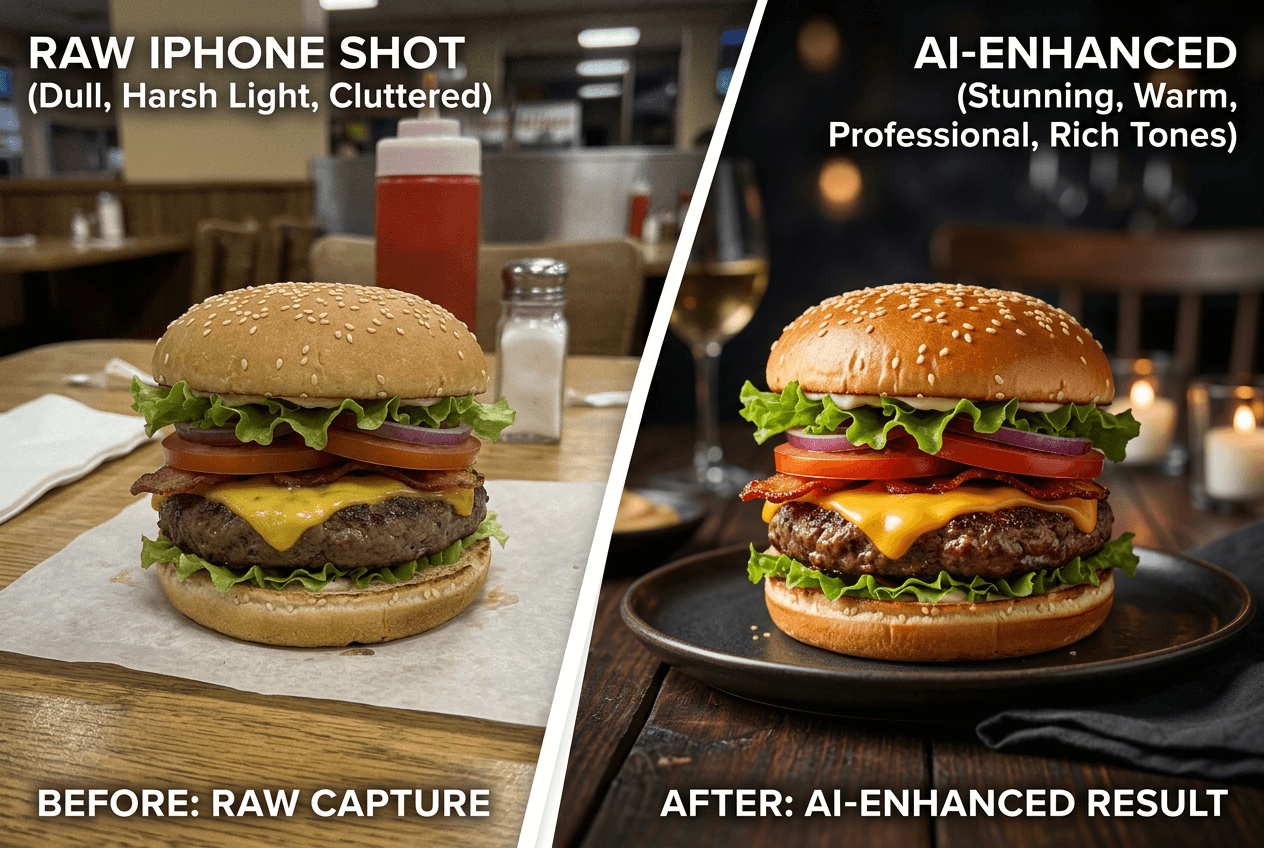 Before and after food photo enhancement showing iPhone capture to professional quality result
For restaurants shooting dozens of dishes for menus or delivery apps, this workflow (capture well → basic edit → AI food photography enhancement) cuts what used to be a full-day professional shoot down to an afternoon with your iPhone. See the food photography cost comparison to understand the savings — or explore FoodShot AI plans starting at $15/month.
Frequently Asked Questions
Should I shoot RAW or HEIF for food photos?
Shoot HEIF for 90% of your iPhone food photography — file sizes stay manageable and the quality is excellent for social media and delivery app images. Switch to ProRAW when you're dealing with tricky lighting (dim restaurants, mixed artificial light, harsh backlight) and need maximum editing flexibility. ProRAW files run about 25MB each, so they fill up storage quickly.
Does Portrait mode work well for food photography?
Yes — surprisingly well. Position your iPhone 2–8 feet from a single plated dish, and Portrait mode creates a creamy background blur that mimics a professional camera with a fast lens. Set the f-number to f/2.8–f/4 for a natural look. It struggles with flat-lay shots and multiple dishes, so stick to Photo mode for those.
What's the best iPhone lens for overhead food shots?
The 0.5x Ultra Wide lens gives you the widest field of view, which is ideal when you're shooting a full table spread or multiple dishes from directly above. For a tighter overhead shot of a single dish, use the 1x main lens. The telephoto lenses don't work well overhead because the minimum focus distance puts them out of focus at typical table-to-phone heights.
How do I fix orange/yellow food photos from restaurant lighting?
Warm tungsten and fluorescent lighting are the biggest color cast culprits in food photography. The native Camera app doesn't let you set white balance manually, so use Halide or Lightroom Mobile's Professional Mode to set white balance to approximately 3200K (tungsten). If you've already taken the photo, go to Photos > Edit > Warmth and slide it toward the blue/cool side until the whites look neutral. For a one-tap fix, upload to FoodShot AI — the AI automatically corrects color balance during enhancement.
Do I need a tripod for iPhone food photography?
For overhead flat-lays and low-light situations, yes — a tripod makes a noticeable difference in image sharpness and consistency. A basic phone tripod with a flexible arm costs $15–30 and pays for itself on the first use. For 45-degree and eye-level food shots in decent natural light, steady hands and AE/AF Lock are usually enough.