Cupcake Photography: Shoot Pretty Cupcakes Like a Pro
Cupcake photography looks easy until you try it. The frosting goes flat, the liner blows out, the swirl tilts because you stood too close, and the colors come out yellow under your display case lights. Then you watch a competitor's grainy phone shot get 4,000 likes and wonder what you're missing.
This guide is written for cupcake shop owners, bakery operators, wedding bakers, and home bakers who need pictures that sell — not hobby food bloggers with three hours and a softbox. We'll cover the four shots every cupcake business needs, how to light frosting without hot spots, which liners actually photograph well, and a one-handed phone technique you can run between customers. By the end, you'll love how fast you can turn a tray of cupcakes into a feed of menu-ready images. We'll also show how to skip the whole setup with AI if you'd rather just bake.
Quick Summary: The four shots every cupcake business needs are the single hero (3/4 angle), the cluster of 3-5 (eye-level), the cross-section bite (eye-level, sharp serrated knife), and the top-down dozen (true 90° overhead). Light from the side at 90-135° to bring out frosting ridges, use a $3 white poster board reflector, and shoot at 1.5-2x zoom on your phone to kill barrel distortion on tall swirls.
Why cupcake photography is harder than it looks
A cupcake is the trickiest subject in the bakery. It's small, it's tall, it's part dessert and part packaging, and every surface reflects light differently. Every sweet little detail — from frosting ridges to liner pleats — has to read clearly in the final photo.
Tall frosting plus a close lens equals distortion. Smartphone wide-angle lenses curve the edges of anything within 8-10 inches. Pull in close on a 3-inch buttercream swirl and you'll watch it lean like the Tower of Pisa. The fix is counter-intuitive: step back and zoom in.
Glossy ganache and shiny buttercream create hot spots. Specular reflections — the bright white blowouts where light bounces straight off a curved glossy surface — are the single most common cupcake photo killer. Hot spots flatten texture and make the frosting look plastic.
Liners are part of the composition, not packaging. From any angle that isn't a true overhead, the wrapper is in the frame. A flimsy grease-stained paper liner can ruin an otherwise great shot of an otherwise gorgeous bake.
Single hero versus dozen ensemble are completely different setups. A single cupcake needs intimacy and texture; a dozen needs pattern and rhythm. You can't shoot both from one angle and expect both to work.
Display case lighting destroys color. Fluorescent and warm-white LED bulbs cast a yellow-green tint that no Instagram filter fully fixes. Always move the cupcake to window light if you can — even three feet matters.
The 4 cupcake shots every bakery needs
Before you pick up your phone, decide which of these four shots you're trying to make. Each one solves a different marketing problem, uses a different angle, and rewards a different setup. Master all four and you have a shot list that covers menus, social, ads, and Pinterest pins for every recipe in your repertoire.
 Cupcake photo shoot styling table showing single hero cluster and cross-section bite compositions
1. The single hero shot
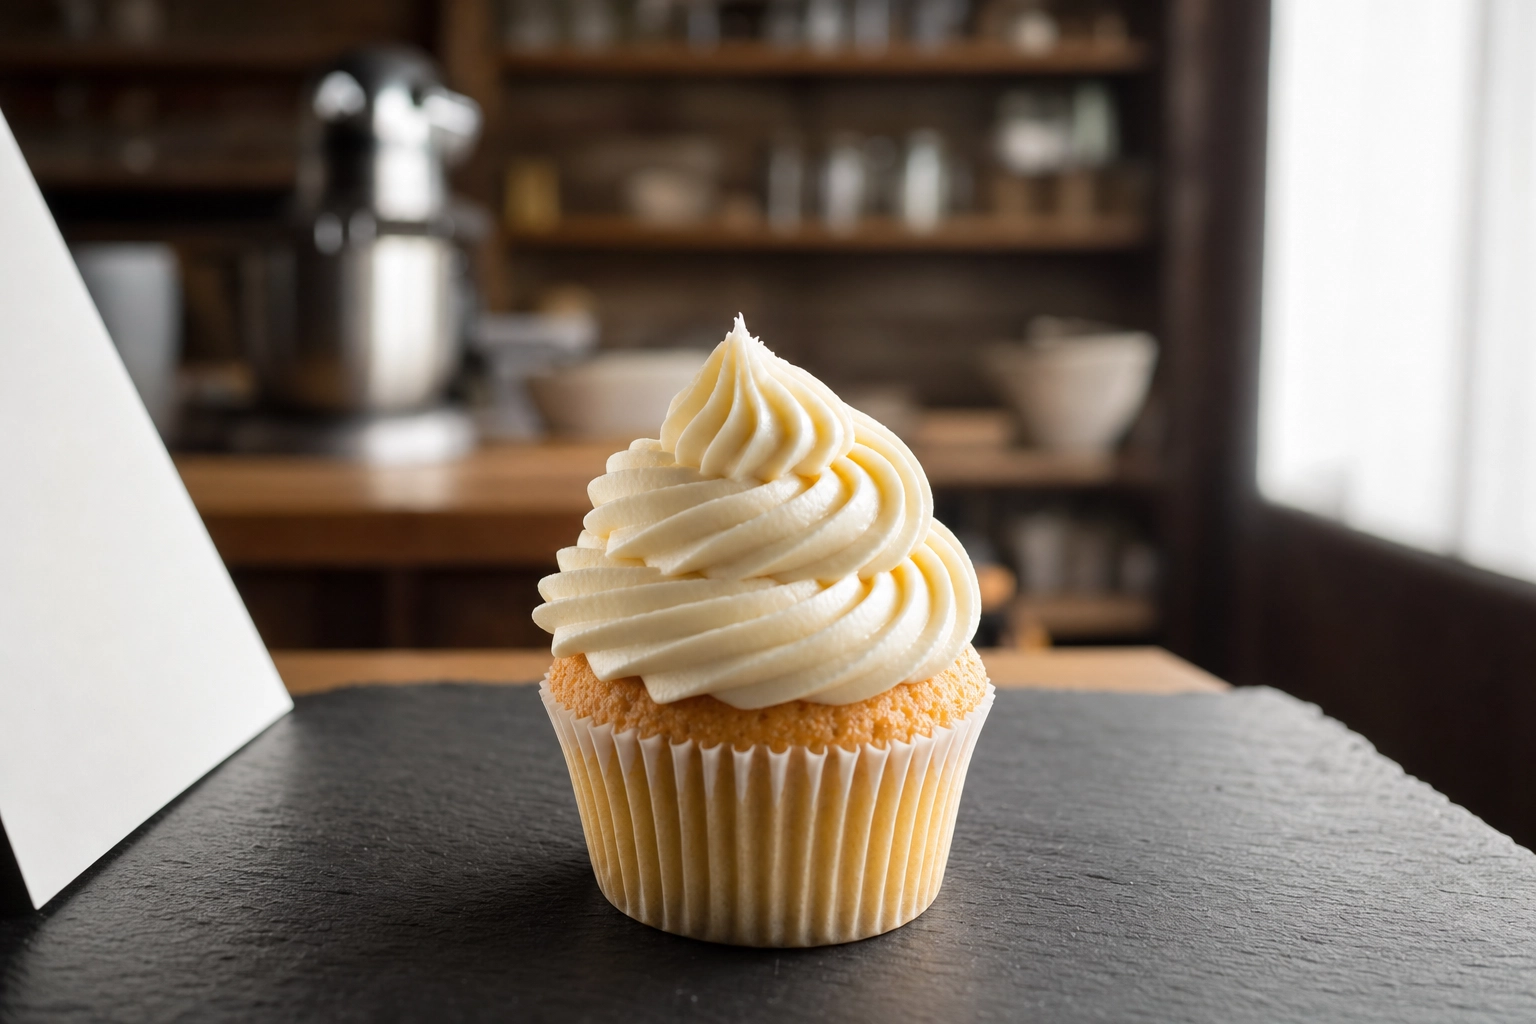
This is your menu image, your single-flavor launch post, your "today's special" board. Shoot at eye-level or a slight 3/4 angle (about 30 degrees down from horizontal) so the swirl height reads. Frame tight, but leave a little negative space above the frosting so it can breathe.
Use a 50mm equivalent focal length when possible — that's roughly 1.5-2x zoom on most smartphones, or the "1x" lens on iPhone Pro models with a tap to the 2x. The longer focal length flattens distortion and makes the cupcake look the proportions it actually is. Background should be simple: a clean linen, a marble slab, a painted wood board. Anything that competes with the swirl will pull the eye away from it.
2. The cluster or bouquet shot
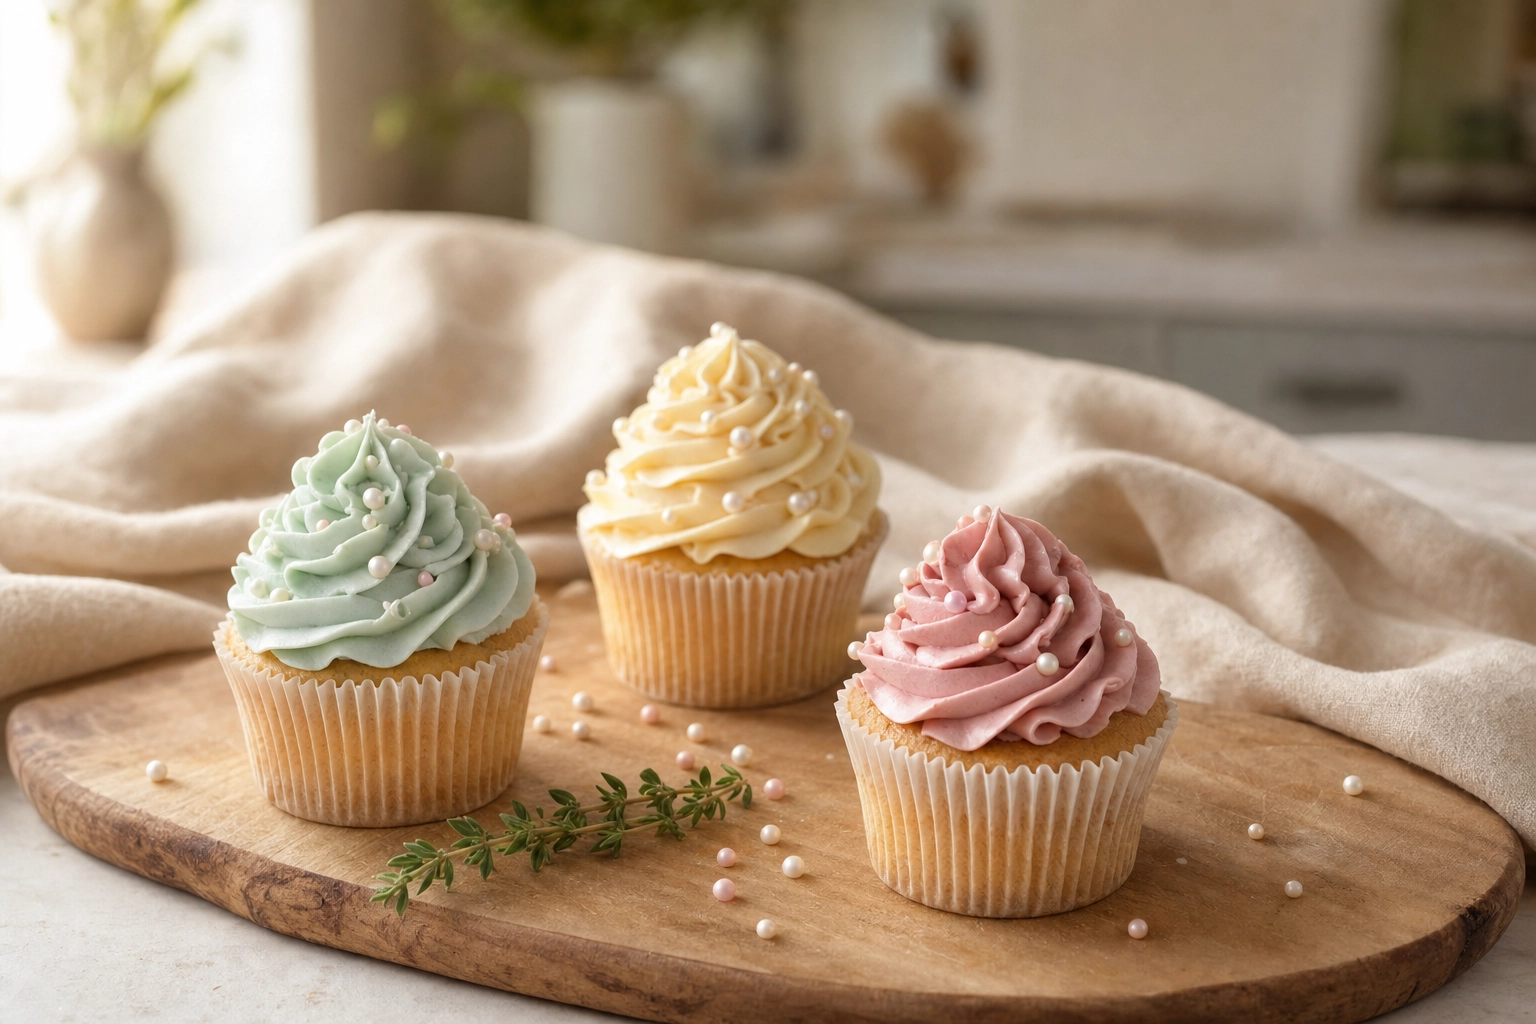 Cluster of three pastel cupcakes on a wooden serving board arranged in a triangle with side window light
Three or five cupcakes (always odd numbers — the eye finds asymmetry more dynamic than pairs) arranged in a loose triangle, shot from eye-level or a soft 3/4. This is your event tasting hero, your wedding inquiry photo, your gift assortment post — the picture customers fall in love with before they ever taste a crumb.
Stagger heights with a small wooden board or two if you have a mix of regular and mini sizes. Leave 1-2 inches between each cupcake so the swirls don't physically merge in the frame. The rule of odds — using three, five, or seven of something — creates visual harmony that even numbers can't match. It's a real compositional rule, not folklore.
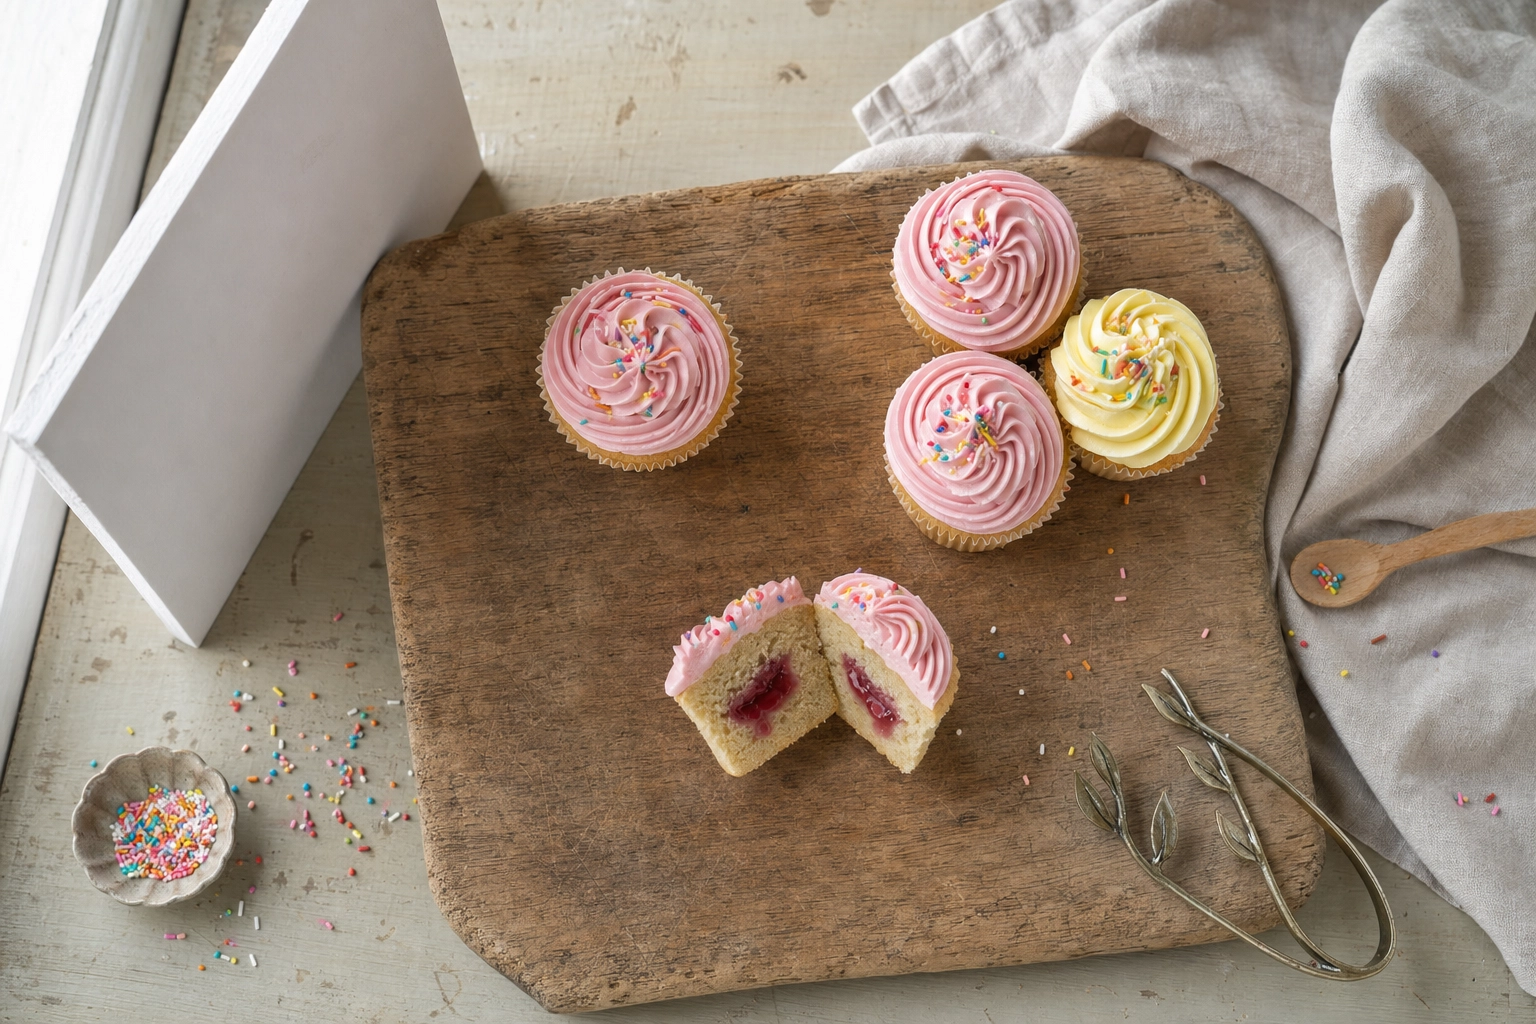
3. The cross-section bite shot
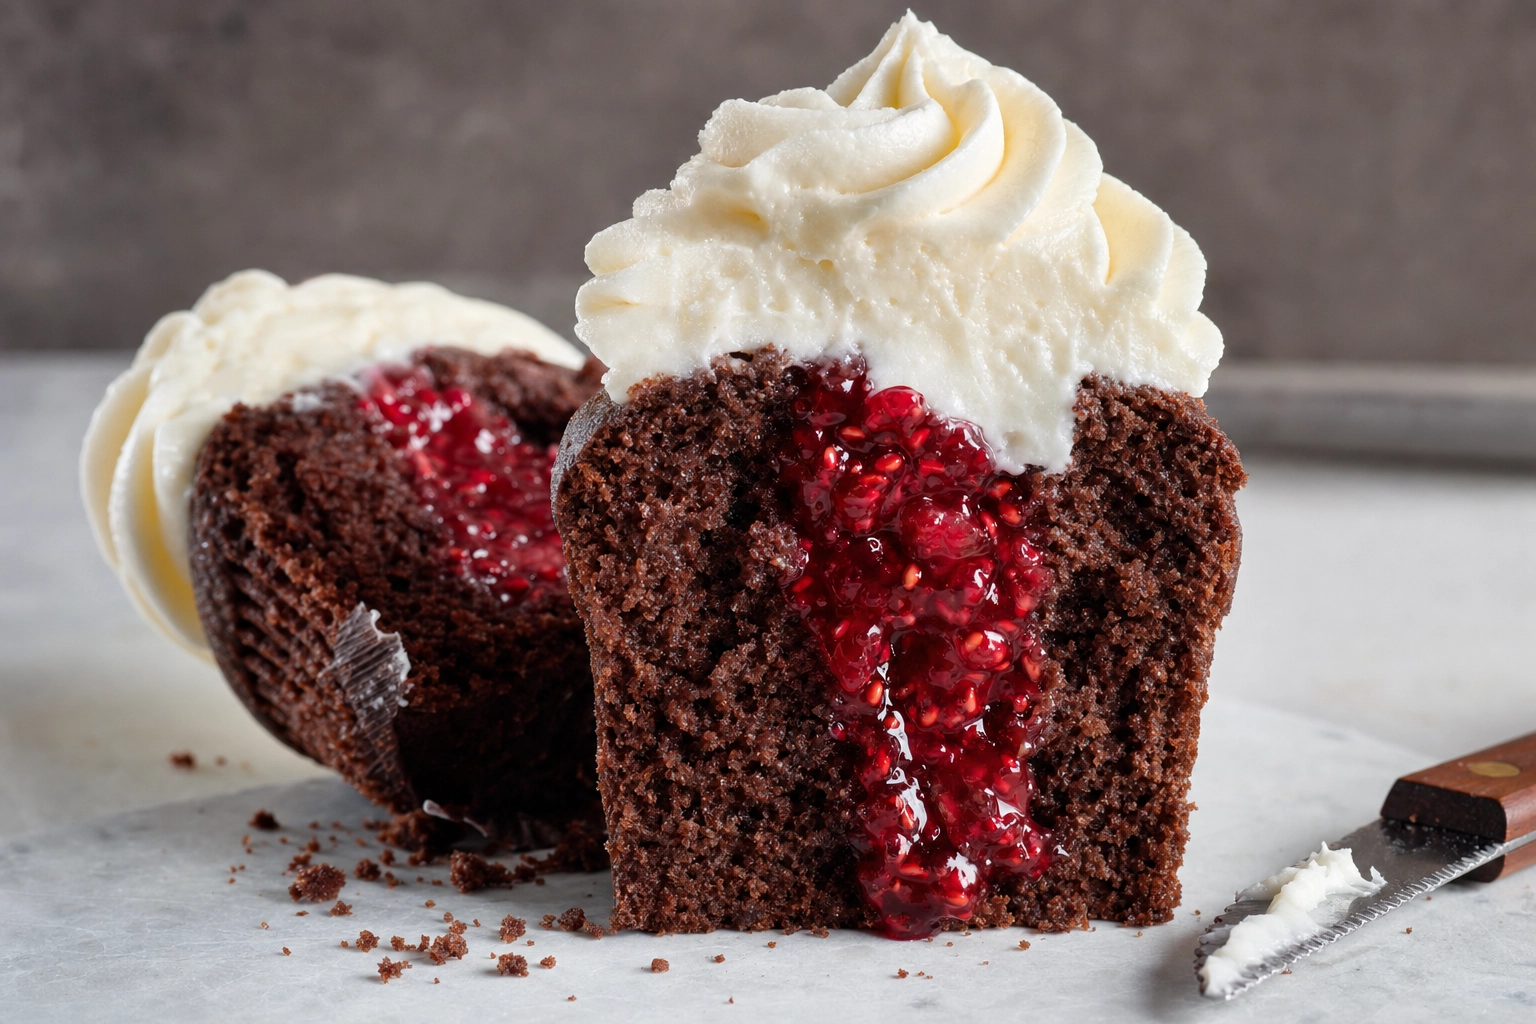 Eye-level cross-section bite shot of a chocolate cupcake with raspberry jam filling and intact frosting
A clean vertical slice through a cupcake to reveal filling, crumb, and frosting height. This shot exists for one reason: drool factor on social. It's the highest-engagement cupcake shot on Instagram, TikTok, and Pinterest pins because it answers the unspoken question: what's inside?
Use a serrated knife (a small offset bread knife works great) and saw gently — don't press. Wipe the blade clean between cuts with a hot damp towel so the next cut isn't smeared. Shoot at eye-level with side light to make the filling glisten. If your recipe calls for jam, caramel, or curd filling, slightly underfill so it doesn't ooze out before you get the shot.
4. The top-down dozen shot
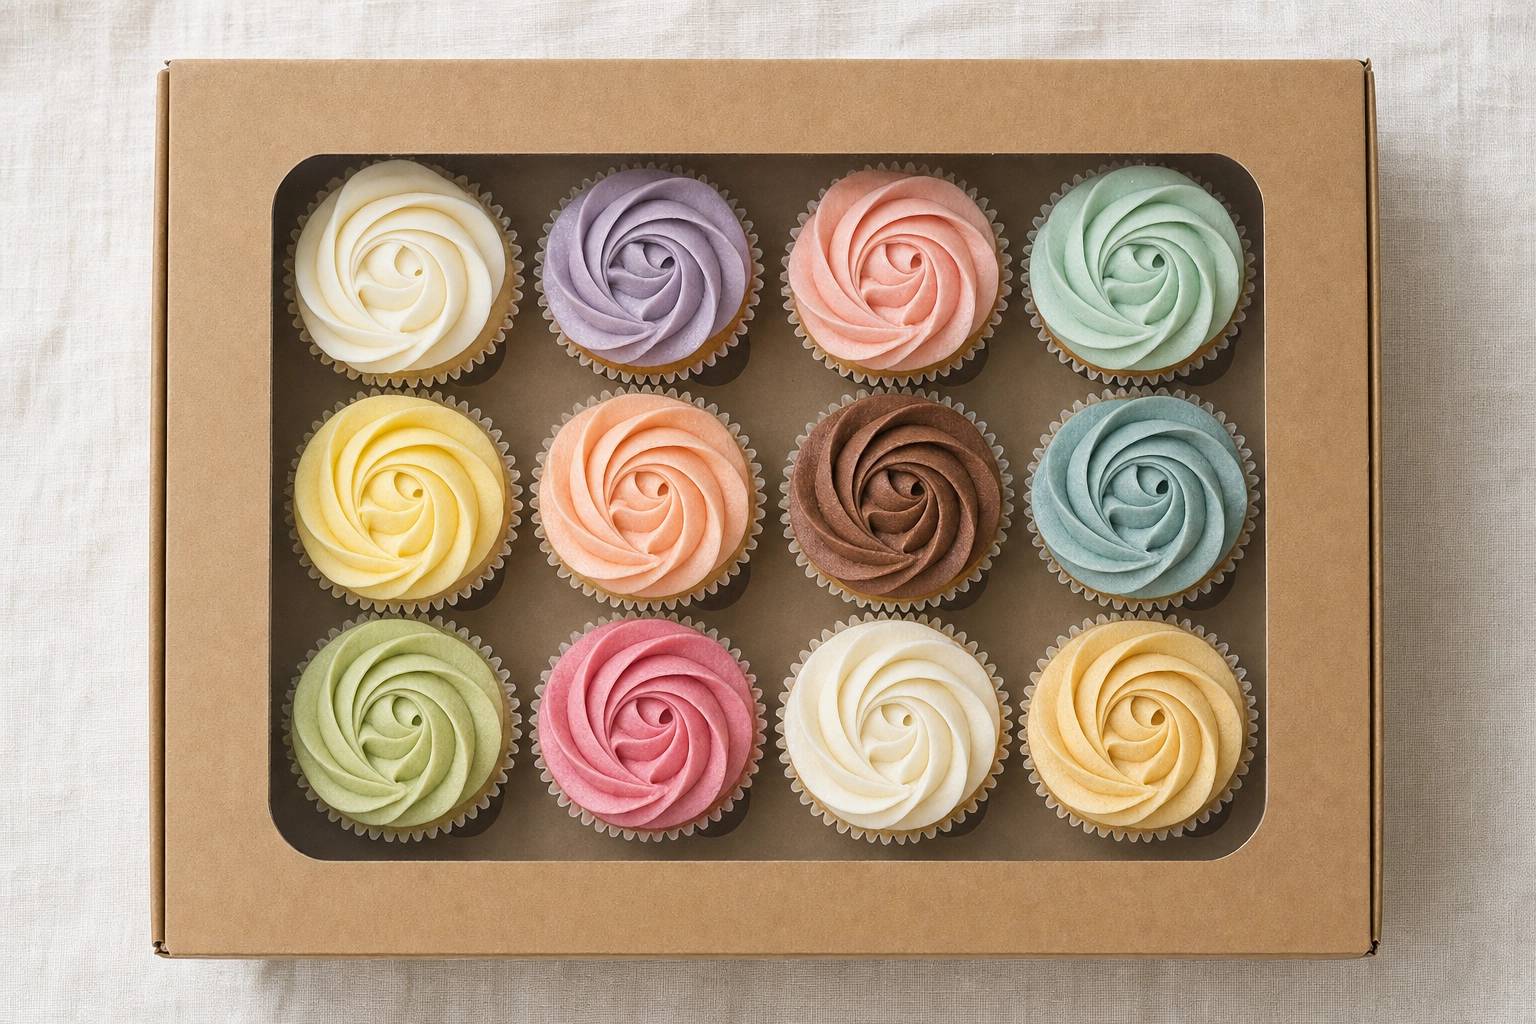 Top-down overhead flatlay of a dozen pastel rosette cupcakes arranged in a kraft bakery box
True 90-degree overhead, phone or camera directly above the cupcakes. This is your boxed dozen marketing, your Instagram grid filler, your catering catalog page. The challenge is consistency: cupcakes that lean, frostings that aren't centered, and liners that pinched in the oven will all read like flaws when shot from above.
Use a grid (even spacing in a 3x4 or 4x3 layout) or a deliberate flat-lay arrangement grouped by color or flavor. Use a phone tripod with an overhead arm if you shoot dozens regularly — handheld overhead is fine for one or two shots, but holding your phone steady at 90° gets exhausting fast and your arms will appear in shadow.
Lighting frosting swirls without hot spots
Frosting texture is the whole game in cupcake photography. The ridges of a piped swirl, the crystalline edges of crusted buttercream, the matte velvet of ganache as it sets — all of that lives or dies on your lighting direction.
 Cupcake side lighting setup with white poster board reflector showing dramatic frosting ridge shadows
Side light at 90 degrees is the default. Place your light source (a window, a softbox, a panel) directly to the left or right of the cupcake. Shadows cast across the swirl reveal every ridge. This works for buttercream rosettes, star tip swirls, and matte-finish frostings.
Side-back light at 135 degrees is the upgrade. Move the light slightly behind the cupcake so it rim-lights the top of the swirl. This adds glow and dimension — perfect for whipped cream, meringue, and lighter frostings. You will need a reflector on the opposite side to lift the shadow on the camera-facing side or the front will go too dark.
Front lighting kills the cupcake. Light coming from behind your camera (flash, ring light, ceiling fixture directly above the cupcake) flattens every ridge and gives you a pancake with frosting. Never shoot a cupcake with the light over your shoulder.
The reflector trick. A white poster board from any office supply store costs $2-5 and works as well as a $40 commercial reflector for any cupcake shot. Hold it on the opposite side of the light, angled toward the cupcake, about 6-12 inches away. The bounced fill light tames the shadow side without washing out the texture.
Glossy ganache fix. Specular hot spots happen because your light source is small and the cupcake is curved. Two fixes: make the light bigger (move the cupcake closer to a larger window, or stretch a sheer white curtain in front to enlarge the source) or move your camera position by a few inches until the hot spot rolls down the side of the dome instead of sitting on top of it.
Wrapper and liner choices that change everything
The liner is in every frame that isn't a top-down. It frames the cake, it sets the tone, and the wrong choice can drag down an otherwise gorgeous bake.
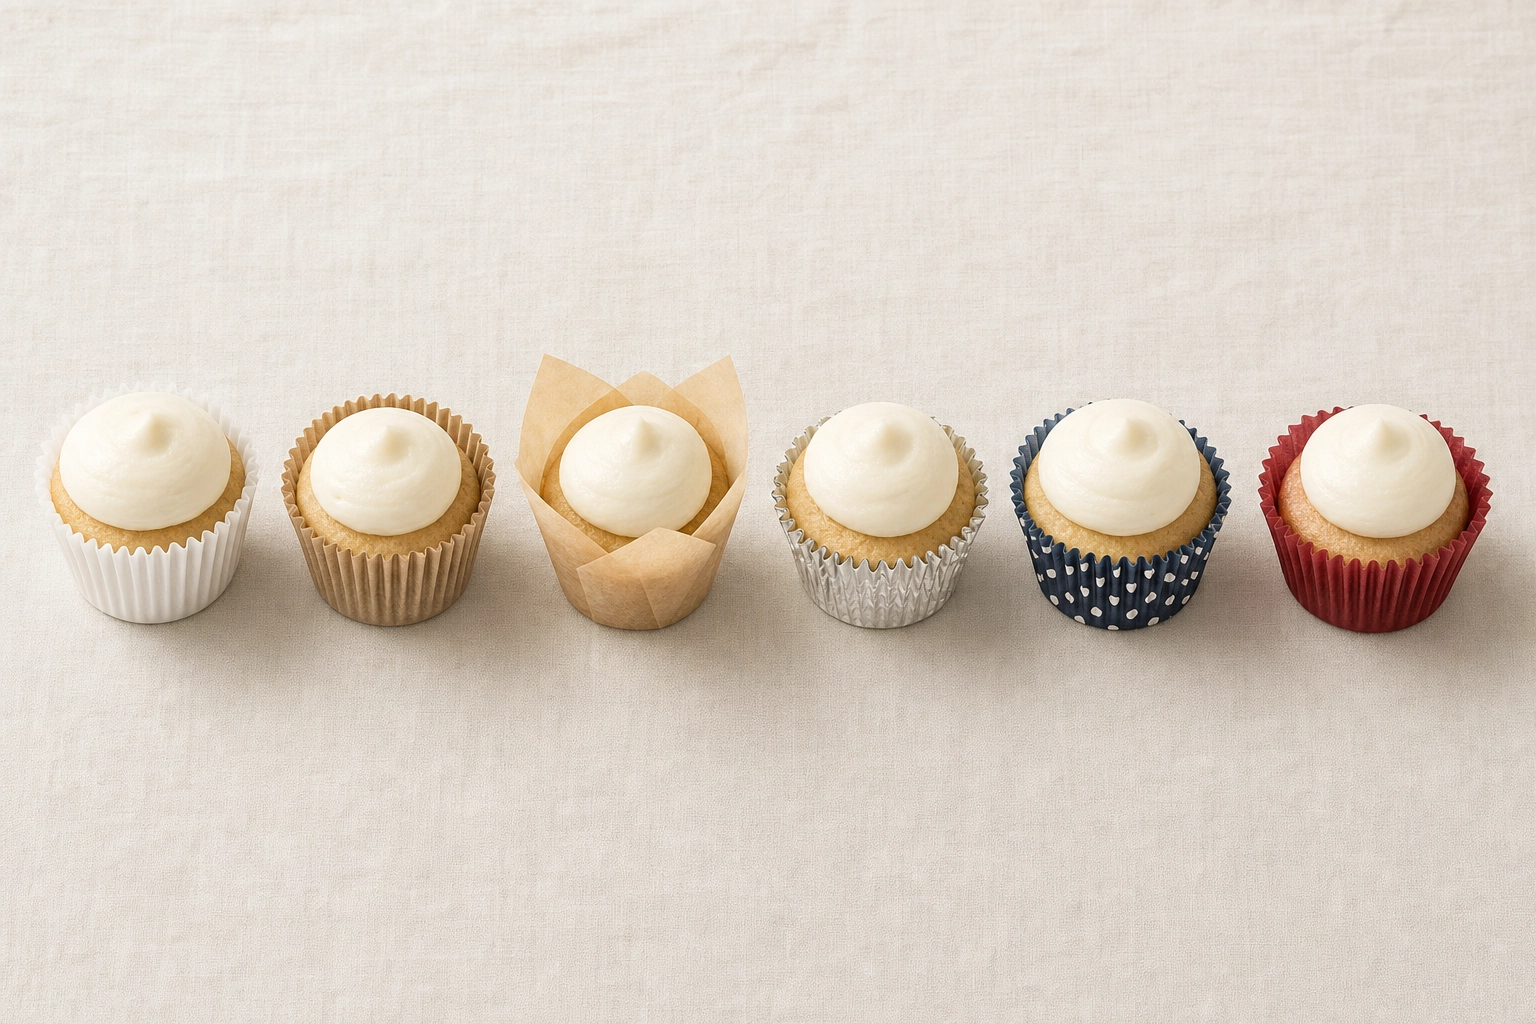 Six different cupcake liner styles arranged in a row showing white kraft tulip foil patterned and greaseproof
White (standard or greaseproof): The neutral default. Works with every flavor and every backdrop. Hard to go wrong, easy to overlook.
Kraft brown unbleached: Rustic bakery aesthetic. Pairs beautifully with vanilla, caramel, brown butter, and chai. Skip it for anything pink or pastel — it'll mute the frosting color.
Tulip-style unbleached: Tall, pleated, premium. The signature liner of high-end cupcake shops. Photographs taller than standard paper and gives the cupcake a "wedding-cake-individual" presence. Customers love how premium these read on a shelf or in a gift box.
Foil liners: Glamorous for events and weddings, but watch the reflectivity — a metallic surface will catch your key light and add an unwanted highlight to the frame. Diffuse harder when shooting foil.
Decorative patterns: Use sparingly. A busy liner competes with the frosting design for attention. Best paired with a smooth dome or simple star swirl, never with elaborate piping or sugar work.
Greaseproof colored: Holds color better than basic paper liners during baking. If you've ever pulled cupcakes out of the oven and watched a pink liner fade to washed-out salmon, switch to greaseproof. The pigment stays vibrant through the bake.
The bleeding fix: Red velvet and dark chocolate recipes bleed dark stains through standard paper liners. Always double-line (one liner inside another) or use thicker greaseproof versions for darker recipes. A grease-streaked liner reads as "stale" in a photo even when the cake is fresh from the oven.
Frosting techniques that photograph like a dream
Photography starts with how you pipe. A messy swirl can't be saved by lighting; a confident one can be photographed by anyone — even a hobbyist baking from home.
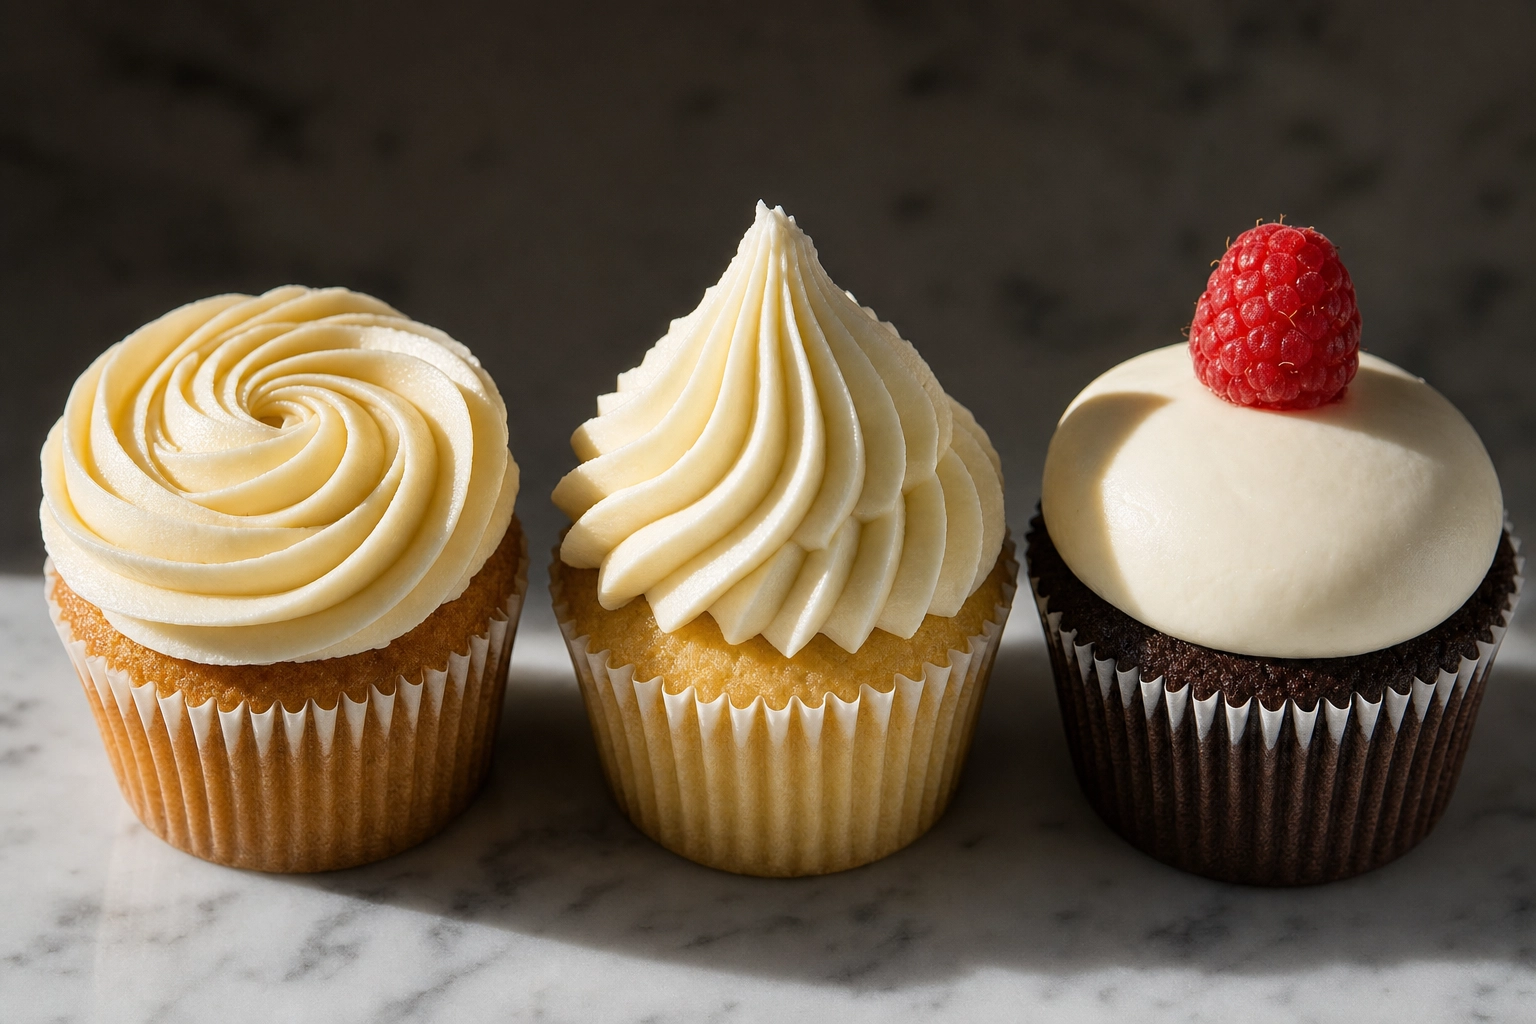 Three cupcake frosting techniques side by side — rosette star tip swirl and smooth dome under side lighting
Rosette (Wilton 1M or 2D closed star): Pipe a tight spiral starting from the center and working outward in one continuous motion. Photographs spectacularly from overhead — it looks like a piped rose. Also strong at eye-level if your spiral has good vertical lift. The signature look of most boutique cupcake shops because it photographs well from every angle.
Star tip swirl (Wilton 1M open star or Ateco 6B): The classic "soft serve" look. Pipe in a cone from a wider base to a peaked top. Defined ridges catch side light dramatically and create the rhythmic shadow lines that make cupcake photos feel sculptural. Best shot at 3/4 angle.
Smooth dome (offset spatula or Wilton 1A large round tip): A polished, glass-smooth surface. Modern, minimalist, and a favorite of fine pastry shops. Photographs cleanly at eye-level but demands careful lighting — a smooth surface is a mirror for specular hot spots. Diffuse your key light more than you think you need to.
Drip topping (ganache, glaze, or salted caramel): Pour a slightly warm ganache over a chilled dome of frosting so the drip stalls at the liner edge instead of running off. The drips are the hero — they create motion, gloss, and luxury cues. Best at a low 3/4 angle so the drips catch directional light. Always shoot drips fresh; ganache loses its shine within 10-15 minutes as it sets.
A pro habit: Pipe a "throwaway" cupcake first. The first pipe is always uneven as the bag warms up and air pockets work out. Use that one for your tasting, then start your shoot with cupcakes two through six. Your pictures will look more consistent and your piping more confident.
Flavor-by-flavor cupcake photography tips
Every flavor wants a different mood. Match the lighting and backdrop to the cake instead of forcing one bakery aesthetic onto everything.
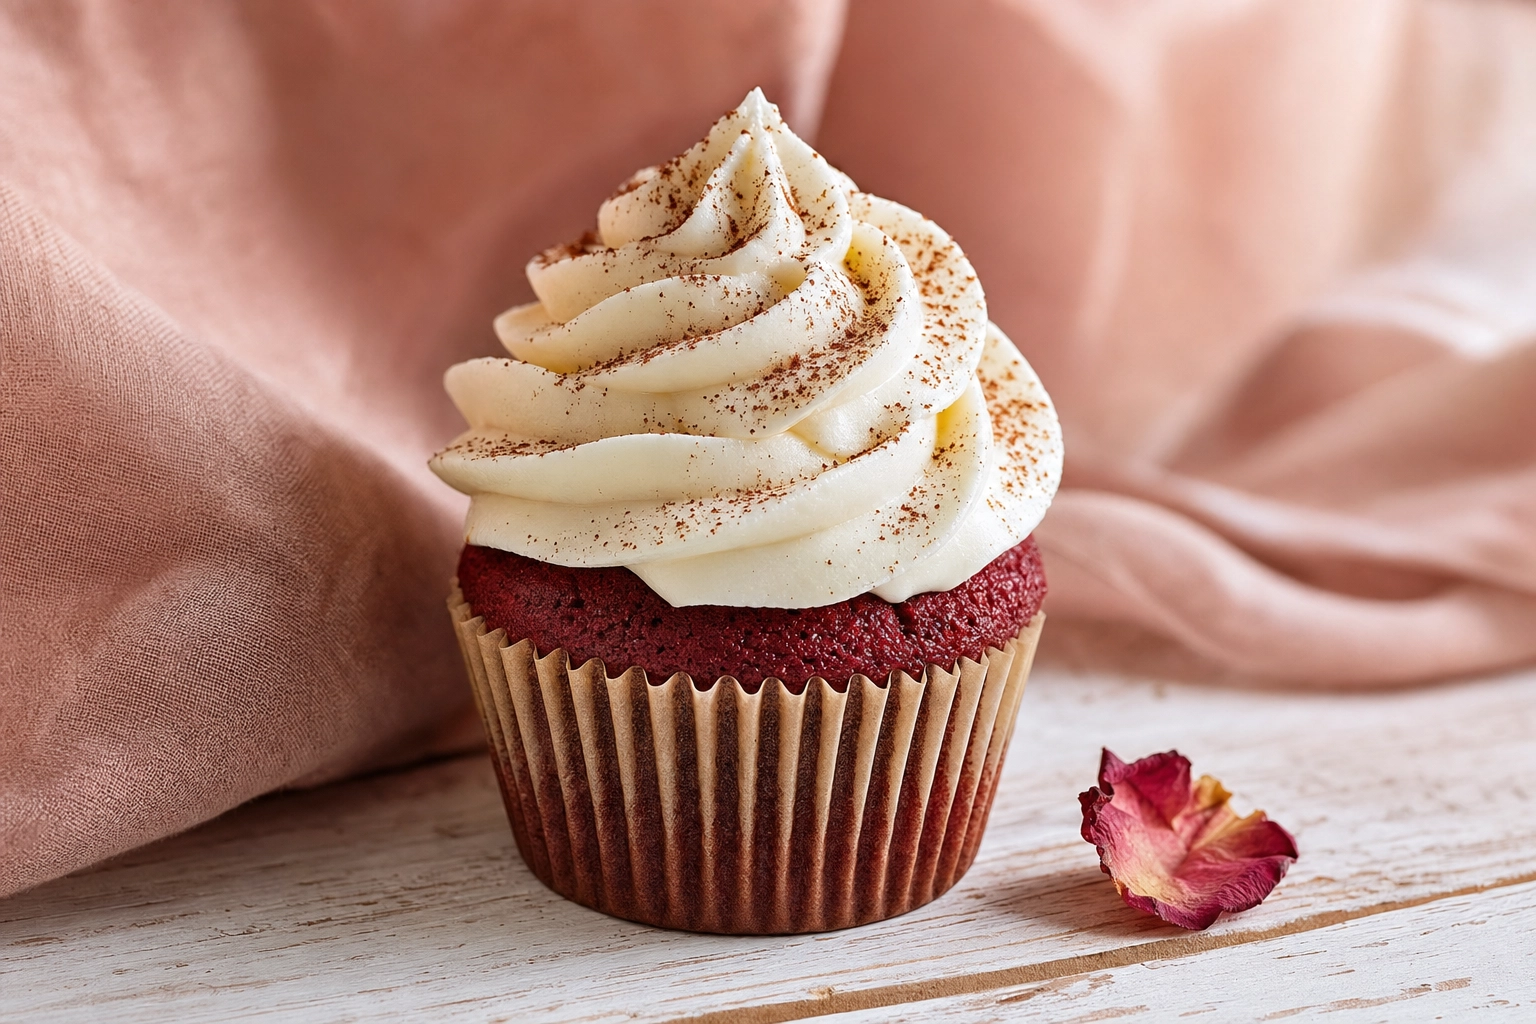 Red velvet cupcake with white cream cheese rosette and cocoa dust on blush pink linen styled flavor photography
Chocolate: Lean dark and moody. Use a dark walnut board, slate, or charcoal linen background. Add a warm color accent — a halved fresh raspberry, a drip of caramel, a curl of dark chocolate — to break up the brown-on-brown. A 135° side-back light brings the gloss of chocolate frosting to life.
Red velvet: This flavor's cream cheese rosette is the photogenic star, not the red cake itself. Dust a pinch of cocoa powder on top, set against a soft cream or blush backdrop. Red on red clashes; red on warm-neutral sings. Light evenly with diffused window light.
Lemon: Bright and airy. Use white linens, a marble or pale wood board, and zest a fresh lemon over the cupcakes for textural fleck. Add a curl of candied peel or a single thin slice as a garnish. Shoot at slightly higher exposure than you would for chocolate — the photo should feel like sunshine through a kitchen window.
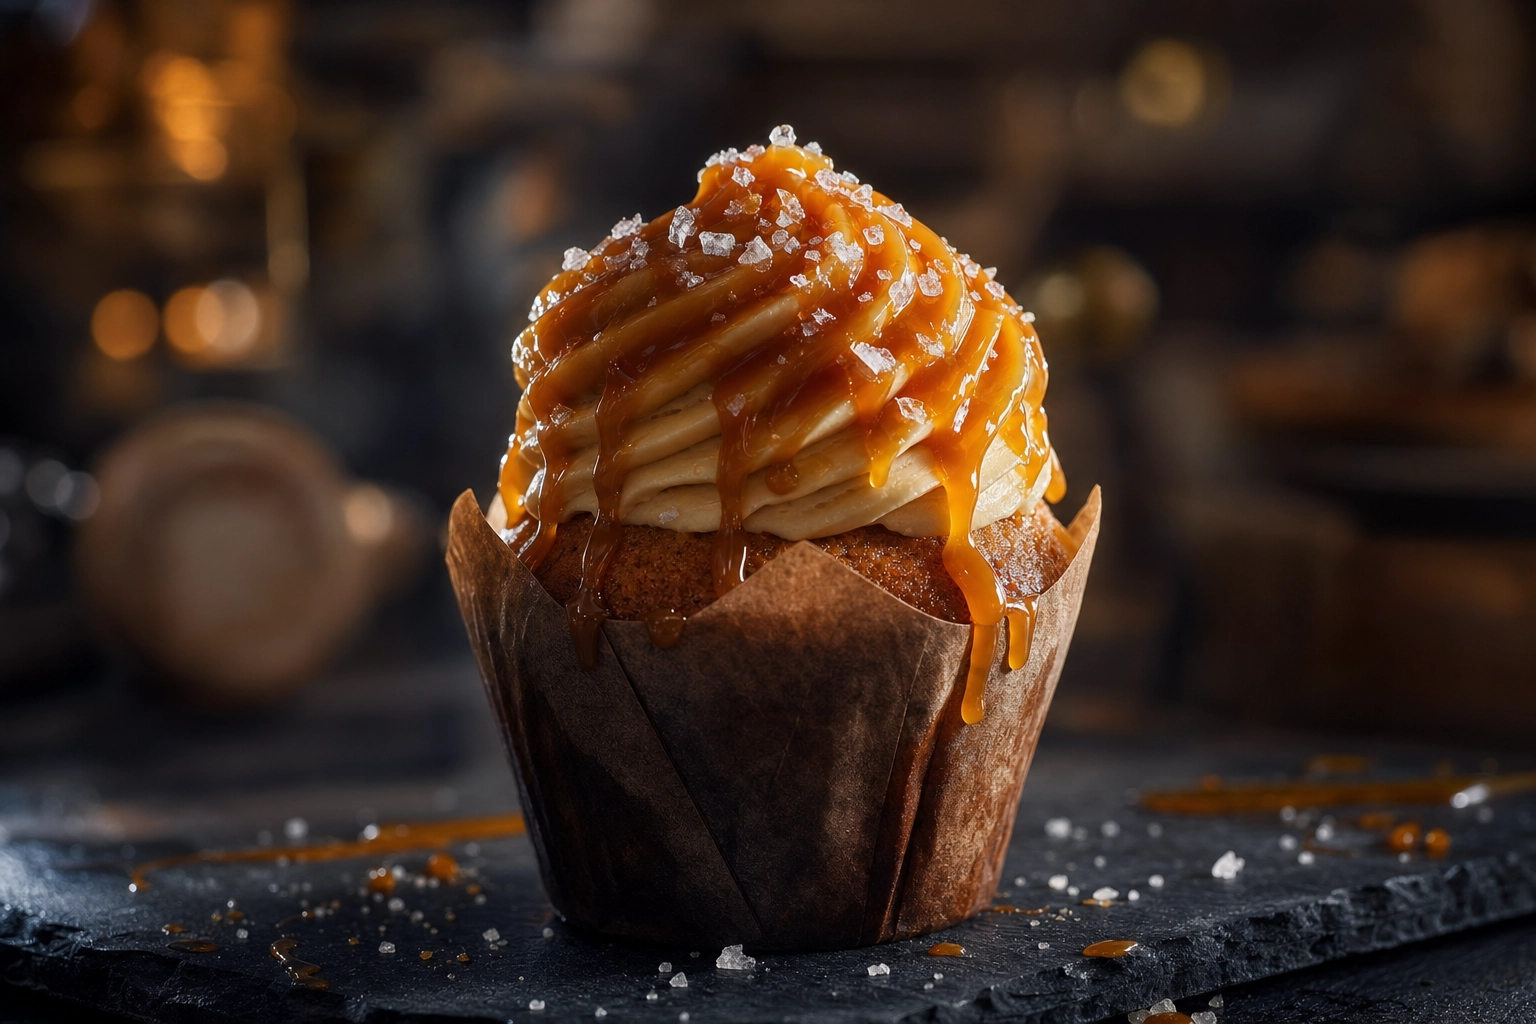
Salted caramel: The caramel drip is the hero. Dark, directional side-back light at 135° catches the gloss of the drip and the flake salt crystals on top. Shoot fast — caramel drips lose their shine within minutes as the sugar starts to set. A small espresso saucer or vintage spoon in the frame adds context without distracting.
Themed and seasonal cupcakes: Build the prop story before you build the shot. Halloween wants dark backdrop, cobweb texture, and a single orange or black liner detail. Valentine's wants blush linens, dried roses, and warm directional light. Holiday wants pine, cinnamon sticks, and a tartan napkin. The cupcake is the subject; the props establish the season.
The one-handed counter shot (for bakery staff)
You're between customers. A walk-in just dropped off a custom order, the morning bake is in the case, and your social manager wants today's flavor on the feed by lunch. You have 30 seconds and one free hand. Here's how to nail it in real time.
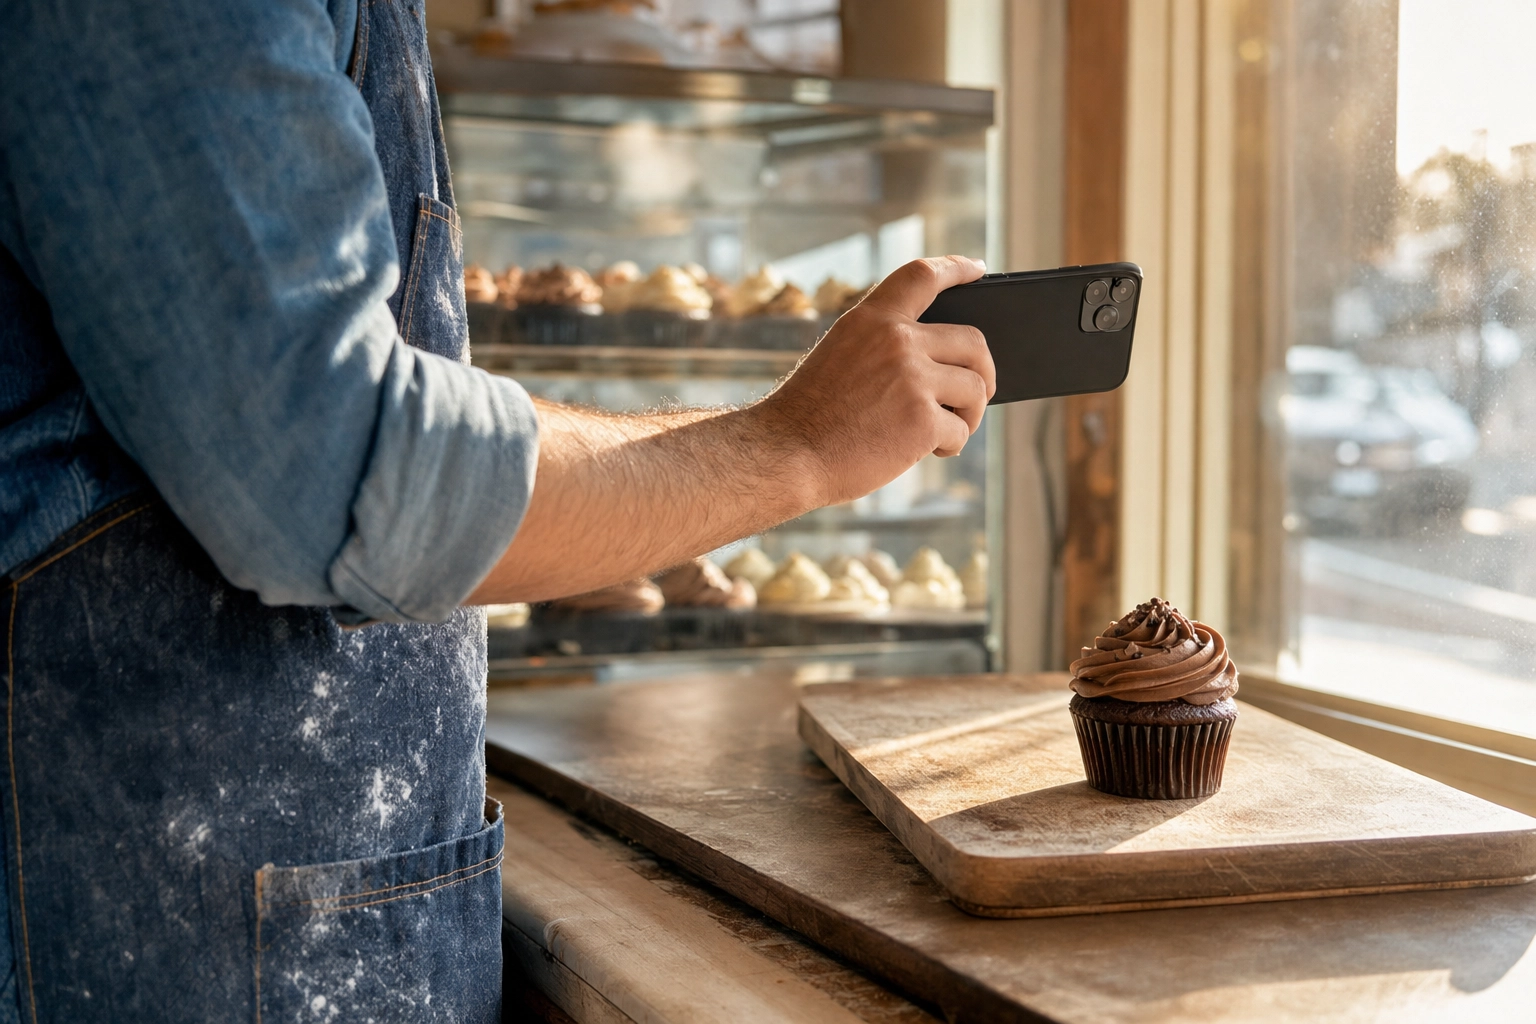 Baker taking a one-handed phone photo of a cupcake near a bakery window with display case in background
Use the 1x lens, never the wide. The ultra-wide (0.5x) lens on every modern smartphone exists for landscapes and group photos, not tall frosting. It distorts edges hard and will warp your swirl every time. Tap the 1x button before you shoot.
Tap and hold to lock focus and exposure. Press and hold on the frosting peak until you see "AE/AF Lock" on screen. That tells the phone to stop hunting focus and exposure mid-shot — critical when you only have one steady hand.
Brace your elbow on the counter. Single-hand stability is impossible if your forearm is floating. Plant your elbow on the counter or display top, hold the phone in your fingers (not your palm), and tap the shutter with your thumb.
Zoom to 1.5-2x, don't lean in. This is the big one. Resist the urge to bring your phone closer to the cupcake. Step back, raise your phone to the cupcake's eye-level, and zoom in. You'll kill the barrel distortion that ruins tall swirls.
Burst mode for the keeper. Hold the shutter for a 5-frame burst. One of those frames will be sharper than the others — pick that one and delete the rest. Hand shake is invisible at 1/250 second shutter, and burst mode gives you the odds.
Move to window light. Display case bulbs are designed to make food look appetizing under glass, not to photograph well. Walk three feet to the nearest window before you shoot — even cloudy daylight beats indoor case lighting for color accuracy.
The AI shortcut: cupcake-shop ready in 90 seconds
If your shop refreshes flavors weekly, hosts events monthly, and runs seasonal promos quarterly, that's 60+ photo shoots a year. Even at 30 minutes each you're burning a full work week on photography — time you'd rather spend baking.
That's where AI changes the math. FoodShot's AI food photo editor takes a single phone snap — even one shot under display case lighting — and turns it into menu-ready pictures in 90 seconds. The trained model knows what cupcakes are supposed to look like: it lifts the frosting, deepens the color, fixes the lighting, and drops the cake into one of 200+ photography styles built for bakeries (wedding tower, birthday confetti, Halloween moody, baby shower soft, blush plaster glow, and dozens more).
A few features that matter for cupcake businesses:
- Builder Mode locks one surface, prop set, and lighting recipe across every flavor you bake — so your menu page or Instagram grid looks like a single shoot, not 30 random images
- My Styles learns your brand aesthetic from three reference shots you upload — so chocolate, lemon, and salted caramel all match your existing visual identity
- Multi-variation output from one upload — get a single hero, a top-down, and a cluster shot from the same source photo in one job
- Bulk processing on the Scale plan handles 5 cupcakes at once, which is perfect for daily flavor rotations
- 4K resolution output works for print menus, posters, Pinterest pins, and DoorDash hero images alike
- Commercial license comes with every paid plan, so you can use the images in ads, menus, and packaging without legal grey area
The cost comparison is brutal. A traditional cupcake photoshoot runs $500-2,500 per session depending on market and stylist. A weekly flavor rotation means 50+ sessions a year — that's $25,000-125,000. FoodShot's Starter plan is $9/month billed yearly with 25 credits, enough for a small shop's monthly menu refresh. The Business plan at $27/month yearly gives you 100 credits — enough for daily flavor posts plus seasonal pivots.
The AI shortcut isn't a replacement for great baking or thoughtful styling. It's a replacement for the half-hour you spend wrestling phone lighting between customers. Bake the cupcake, snap one photo, get back to work, and have a finished image waiting before the next walk-in. See pricing plans for credit volume that matches your output.
For a deeper look at how this works specifically for cupcake businesses, see our AI cupcake photography page. And if you're building a full bakery content workflow, our guides on cake photography and cookie photography round out the bakery trifecta. Our food styling guide covers props, surfaces, and color theory in depth, and the bakery photography use case shows what other cupcake shops are doing with the tool.
Frequently Asked Questions
How do I photograph a tall cupcake without making the frosting look distorted?
Tall frosting distorts because smartphone wide-angle lenses curve everything near the frame edges. The fix is to step back and zoom in. Position yourself 18-24 inches away from the cupcake, zoom your phone to 1.5x or 2x, and shoot at the cupcake's eye-level (not from above looking down). Center the frosting in the frame — edges distort more than the middle. If you have an iPhone Pro or equivalent, switch to the dedicated telephoto lens (the 2x or 3x button), which has a focal length closer to portrait lenses and minimizes barrel distortion. Avoid the 0.5x ultra-wide entirely.
What is the best way to photograph a bake sale display?
Shoot from a slightly elevated angle — about 30 degrees above horizontal — to capture the whole table without losing the individual cupcakes. Use tiered cake stands or wooden crates to add vertical layers so the display doesn't read as flat. Hand-written chalkboard signs add character and context. Position yourself with the natural light from a doorway or window behind you and to one side, never directly behind you (front lighting flattens) or behind the table (backlighting silhouettes). For seasonal sales, frame with autumn leaves, holiday garland, or fairy lights at the edges of the table to set the mood. Leave some sparse spots on the display — a too-perfect table feels staged; a slightly shopped one feels successful.
How do you photograph mini cupcakes so they don't look like regular cupcakes?
Scale is the entire challenge with minis. In a tight close-up, a mini cupcake looks identical to a regular one — so you have to add a scale reference. Group minis in odd numbers (3, 5, 7) on a small surface like an espresso saucer, a mini cake stand, or a slate tile to compress the visual scale. Place a single normal-sized object in the frame — a coffee cup, a fingertip in soft focus, a regular fork — so the eye has a comparison. Use macro mode on newer smartphones (iPhone 13 Pro and later, Pixel 7 Pro and later) to capture frosting texture at very close distances. A top-down shot of a dozen minis in a custom mini box reads as "minis" instantly because the box scale tells the story.
Do I need a DSLR or will my phone work for cupcake photography?
A modern smartphone (iPhone 12 Pro or newer, Pixel 7 or newer, Samsung Galaxy S22 or newer) absolutely works for cupcake photography — most professional bakery social feeds you admire are shot on phones. The phone's limitations show up in low light, in very fine texture (sugar crystals, sprinkle definition), and in distortion on tall frosting. A DSLR or mirrorless camera with a 50mm or 85mm lens will give you more control over depth of field, less distortion on tall swirls, and better performance under display case lighting. But for 90% of cupcake content, the phone is fine — what matters far more is your light direction, your background, and your composition.
What lighting is best for cupcake photography?
Diffused natural window light from the side (90° to your camera) is the gold standard for cupcake photography. It reveals frosting ridges, renders color accurately, and costs nothing. Shoot near a north-facing window if you have one — the light stays consistent all day. If you only have a south-facing window with harsh direct sun, hang a sheer white curtain or bedsheet over the window to soften it into a giant softbox. Avoid all overhead ceiling lights, all display case bulbs, and any single bare bulb — they create either flat front-lighting (no texture) or harsh hot spots (no detail). One $3 white poster board reflector held opposite your window will solve 80% of the shadow problems you'll encounter.
Ready to skip the setup? Snap one phone photo, upload it to FoodShot, and have a menu-ready cupcake shot back in 90 seconds — at roughly 5% of the cost of a traditional photoshoot. See pricing or try the food photo editor with a free credit on us.